


Last winter, I dedicated most of my spare time to shooting better time-lapses. And I learned a lot of things about how to make them smooth and silky. Some of the things I learned were perhaps minor upgrades. Some improvements were just using better gear. Mostly though, the gear was not my issue. Once I really got a solid handle on my time-lapse technique, it was clear that two things in particular really elevated my sequences from nice to beautiful. And those two things might make all the difference for you too. In this feature I'll walk you through my journey to turn time-lapse into a skill instead of a challenge.
WHY TIME-LAPSE?
I love the idea of time-lapse photography because it reveals things that our eyes may not pick up on. It's not just about compressing time into a shorter sequence, it's about revealing patterns and flows that may not be so obvious. A really good time-lapse is a thing of beauty that makes you wish it could just keep going for longer. Which gives us a little bit of a hint of what makes them so devastatingly hard to master.
Capturing a time-lapse is not really so hard. Indeed, there are lots of different ways to put them together. And in a way, that's the hurdle. There are a wide range of options once you start shooting time-lapse. So I wanted to hone my techniques a little, narrow down to what really works. I wanted to give myself the tools to capturing something more satisfying, something illustrative of the place and the location.
I'm aiming for very, very smooth and very, very natural. time-lapses that can sit cleanly alongside the other video work that I do. Without feeling janky or cheap, nobody likes janky or cheap. Seeing as I live in the heart of a very charming city, blessed with gorgeous winter light, I thought I might make an effort to lift my game with time-lapse. I decided to put in some quality time of my own.
GETTING OUT THERE
Before we dig into the techie side of my techniques, I wanna spend a moment to talk about the motivation to get out there and shoot. Time-lapse is a little bit harder than regular photography. You're standing in one place for ages at a time, patiently gathering frames to assemble into a few seconds worth of video. A lot of work for very little reward. And I struggle to motivate myself to get out and shoot at the best of times.
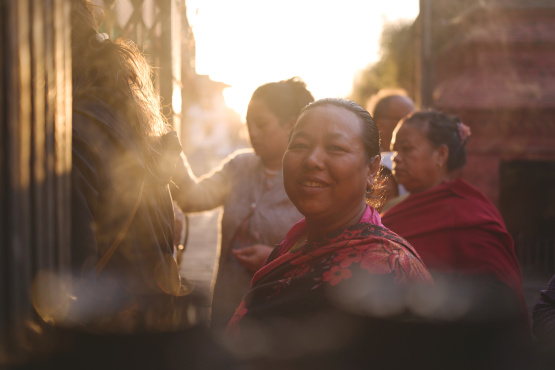
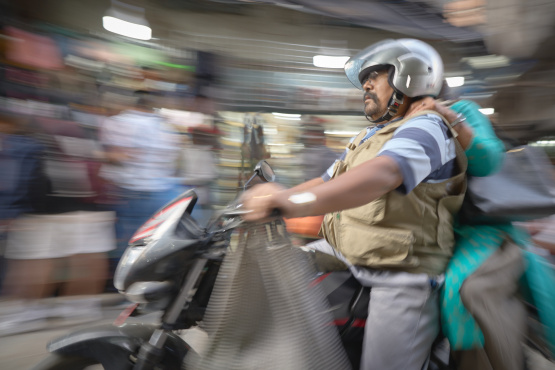
Melbourne is my home, and after being on the road for a month or more, the last thing I really wanna do is to hit the streets with my camera. For me, this feels like work instead of play. I live in a nice little apartment in the middle of the CBD, and I married the most wonderful person in the world. I like being here, right here instead of out there. As an introvert, I'm not always so keen to be out on the city streets. I like the food in Melbourne, I like the public transport, I like the markets. But there's a lot of people out there too, and sometimes they might wanna talk to you.
If I'm standing in the same place for half the afternoon next to a tripod, there's always somebody who wants to have a chat. So my first advice is to pack some earbuds and good podcasts. They make it harder for chatty people to talk to you. Win-win.
But getting out of my apartment at all, that's really the first hurdle. Getting out of a perfectly cozy bed before dawn for no other reason than to wander around in the cold, or giving up that early evening wind down to instead gather your gear and go chase a sunset. A sunset that may or may not make an appearance anyway. I struggled with this a lot.
I always made a plan for every single shoot: Where, when, and what I wanted to capture. But those plans were rarely perfect. The weather alone is a gamble. Often my predictions for how a scene or the light might line up just didn't line up. And at other times, I simply messed up some technical settings and my sequence was ruined anyway.
Going out day after day to come home with less than hoped for is not an easy project. But you have to keep doing it because staying at home won't lead you to better photos.
One thing that really did help a lot was just inviting friends to come join me. This really made a difference to my motivation and my mood. Oftentimes they added much needed energy to the chase. Sometimes my friends had cool ideas of their own to explore as well. But mostly I just get to enjoy little time with people I care about. So on those days when the chase for time-lapse stalled, it didn't really matter so much. Quality time with friends is better than any captures.
STILLS vs S&Q
There are two basic approaches to capturing time-lapses. One is to shoot a ton of still images, edit the raw files and then assemble those JPEGs into a movie. The other starting point is the S&Q mode on your camera. If you're new to the S&Q expression, it simply stands for "slow and quick". This is a fancy way of saying, you're gonna capture video at very high speeds to replay in slow motion, or capture it very low speeds to replay in compressed time. S&Q gives me a shortcut to time-lapse video.
Not all shortcuts are a good idea though. And not every camera is set up for S&Q anyway. On the streets of Melbourne, I've been using the LUMIX S9 and LUMIX S5 Mark II. These cameras have a ton of great features and a few that are of special interest for time-lapse work. They're both 24MP, they both shoot with L-mount lenses, both have custom settings for stills or video. Both offer quick access to time-lapse sequences using the S&Q feature.
For this feature, I won't be delving into S&Q any further. Instead I'm shooting the traditional way where we capture a bunch of stills and we manually bring that together into a time-lapse. For this project I have collected all my sequences using the time-lapse mode for raw stills. This is beautifully implemented in all the LUMIX cameras and very easy to tinker with.
Shooting time-lapse as raw stills not only gives me a lot more detail to work with, but I get maximum creative flexibility too. Takes time to edit and process of course, but I get to apply my creative mind better to the final result. It's time well spent.
You need a decent amount of storage to chase time-lapses using still RAW filesh. One gig of S&Q equates to about 30 gig of RAW time-lapse. Keeping in mind that at least half of what I shoot wasn't gonna be worth keeping anyway. You need time and space to work with raw stills.
The LUMIX time-lapse drive mode lets me set intervals or delays for capture. And it groups those captures into a new folder each time I start rolling. I can also render those stills into a time-lapse video in camera if I want to. I can do that immediately after shooting or select a sequence to render later while browsing the memory card.
180 DEGREES
The first rule of capturing smooth video is to follow the 180 degree rule. This applies to time-lapse just as much as any other kind of video. A lot of people just aren't concerned so much about this rule if they're just shooting for social media or something on their phone. For professional video and broadcast though, it's absolutely critical.
The expression itself is a throwback to early film days when one rotation of your film reel equated to spinning through 360 degrees. It's a circle. They worked out that staccato became noticeable above 180 degrees of spin. If you're not sure what staccato means, it's the jankiness that comes from having big gaps in between significant motion. The human eye remains deceived so long as the gap between the frames and exposures is 180 degrees or less.
You can think of the 180 degree rule as simply half the frame rate. If your video frame rate is 25 frames per second, then your exposure needs to be 1/50th or slower. But it can get a little confusing to calculate the 180 degree rule for a time-lapse. What is the real time in a time-lapse?
Let's imagine I'm working on a video project that will be delivered as a 25fps timeline, but I'm capturing my time-lapse at only one frame per second. So I'm speeding up time by a factor of 25. But it's the capture speed that matters, not the timeline. I'm capturing at one frame per second. So to hit that magic 180 degree window, I need to get my exposures down to half a second or slower. I can't be shooting at 1/50th of a second and expect to see smooth results in my time-lapse.
Following the 180 degree rule is so often the major missing ingredient. I get why so many people ignore this: It's a pain in the neck to shoot half a second exposures on a bright sunny day. The real problem isn't doing the math on 180 degrees. It's how do you get a super slow shutter speed when working in full sunlight?
NEUTRAL DENSITY
Winter light can be very bright when the sun is out. Even on a cloudy day, you can't drop down to half a second exposures without seriously pushing the aperture. And I don't wanna do that. I don't want to shoot at F 22 or something silly because that floods my sense of with diffraction. That creates a very specific kind of blurry. And it's not good. It's not something I wanna see in professionally captured footage.
The solution here is to employ ND (Neutral Density) filters. They are effective, affordable, and simple to work with for time-lapse. I'm not referring to graduated NDs here, but just a straight ND. I also prefer to avoid the variable NDs as they can do strange things in very strong light. Sometimes they create banding patterns on the scene and usually they impart colour tints that vary with the conditions. They potentially introduce a lot of variables that I don't want. Straight NDs are usually cleaner.
My pick for ND filters is OKKO. I tested this lineup a year or so back and they were the cleanest ND filters I've ever seen. Very little colour cast. That makes editing much tidier. The filters I use happen to be magnetic as well, which is just super nice. I can pop them onto the glass in seconds and start tuning my exposure settings.
Sunny days and ND1000 is essential kit. In darker situations, maybe the ND64 will get the job done. I'm looking for that magic half a second exposure or slower. If my ND filter is too strong for those conditions, I can boost my ISO a little bit to lift the exposure. But remember, 180 degrees is the minimum exposure you need for smooth motion. If you push all the way out to 360 degrees, then that works fine too.
The other approach you could use would be to try to "fix it in post". And it is never a good sign when you hear that expression being wheeled out. There's only so much you can do to fix a sequence that wasn't captured right the first time. Applying various effects to try to fill in the gaps or generate the right kind of blur might look like a good option at first glance, but maybe these techniques aren't as convincing as you think. ND filters are a very simple solution to getting your exposures slower and smoother.
PATIENCE
You do have to be very patient to work with these slow shutter speeds and very, very patient to capture nice long sequences. Which brings me to the second essential ingredient for great time-lapse. The first is just capturing nice slow exposures around the one second mark, but the second is to make sure you keep shooting for long enough to get a decent length of playback in the final sequence.
Often I'll be watching a beautifully shot video on YouTube when suddenly they drop in a nice little time-lapse with great composition and beautiful light and BOOM, it's over in four seconds. This is so disappointing. You're just getting a taste of the scene and starting to delve into the details of how things are flowing and the time-lapse over. Like you just get a taste of it. Four seconds is not a time-lapse, it's a tease.
If you get everything else right, you are going to want at least 10 seconds of a sequence to roll. And often, if it's good stuff, you're going to want a lot more than that. Time-lapse scenes provide a nice break point in your video. They're like a time out. They suspend the pace of reality for a moment and they drop the audience into a different reality. You don't want to crash them in and out of this too fast. You want it to be gentle and you want it to be immersive.
The other reason to make it longer is to better reveal the ebb and flow that is happening within your scene. I find this a lot with crowds and traffic. It doesn't matter how long I capture my sequence for, I always end up wishing I had done twice as much. I'm always looking for those special moments when the flow in a scene changes. Things like when a tram arrives at the stop to let people on and off before zooming away again to its next destination. I'm looking for where the flow is revealing something. Hidden lanes when people move over Footbridge. The timing of trains heading to a station. The stop start of cars on a freeway at rush hour.
The key word here is flow. What is flowing and where is it flowing? This is what a good time-lapse reveals, but only if you give it plenty of time to roll.
On my LUMIX gear, there's a little frame counter that runs while I'm shooting. I watch that countdown and I know that once I hit 750 frames, I have 30 seconds worth of playback in the can. I'm not watching the clock, I'm watching the counter. If I'm shooting one frame every second, then those 750 frames will take 12 and a half minutes.
And remember, maybe not all of that 30 second clip will have the ideal flow. Maybe part of it gets clipped by something unexpected moving into the frame. I often find that only part of the full sequence is ideal for my use. But the longer I capture, the more likely I can use the result. It does take immense patience to let the camera run for so long.
Whatever setup I start with, I guarantee that within the first few minutes, I'll start thinking about a better one. I'll stand there shooting a patch of sky and realise the clouds are building up over to the left of frame. I start wondering if I should stop this sequence and go and start a new one in the other direction. It's hard to just trust your own judgment and let the camera roll. But that's the path to better time-lapses.
Slow exposures and longer sequences. If you can bring those two elements together, then you'll start seeing something very special in your time-lapses.
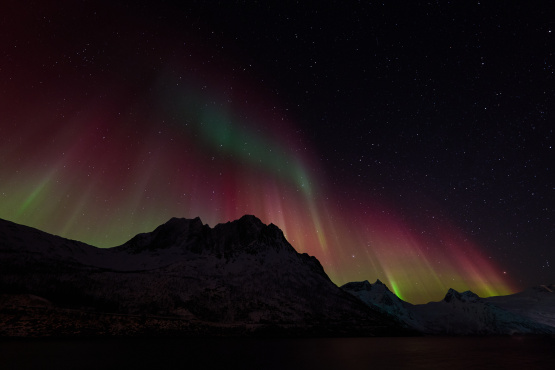
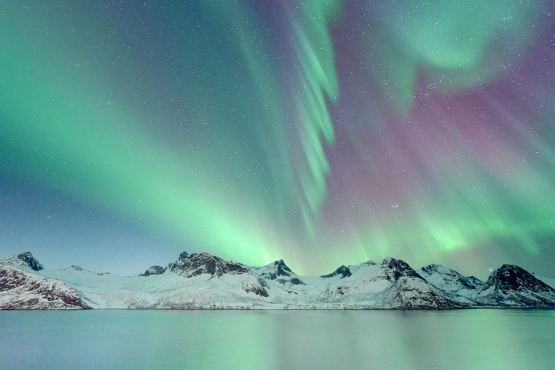
BLUE NIGHTS
One question that comes up a lot is whether to shoot manual. I definitely lock down my focus for time-lapses, so it's not moving about as subjects in the frame move about. But it's rare that I lock down my exposure as well. I find that in good light, when the exposure of the scene remains stable, shooting an aperture priority works fine anyway.
I have a custom setting for time-lapses on my LUMIX S9 and it's set to use aperture priority and it adjusts the exposure length to match the conditions. I'm applying my ND filter to the lens so I get my shutter speed somewhere in the ballpark of one second.
If you prefer to shoot with manual exposure and that works for your workflow, then don't feel you need to change that. That late afternoon light as you head towards sunset, for example, can be nice as the frame turns dark. It conveys the mood a little. But once you start working with dawn and dusk where the scene is moving through a dramatic range of exposures, then maybe aperture priority might be more productive.
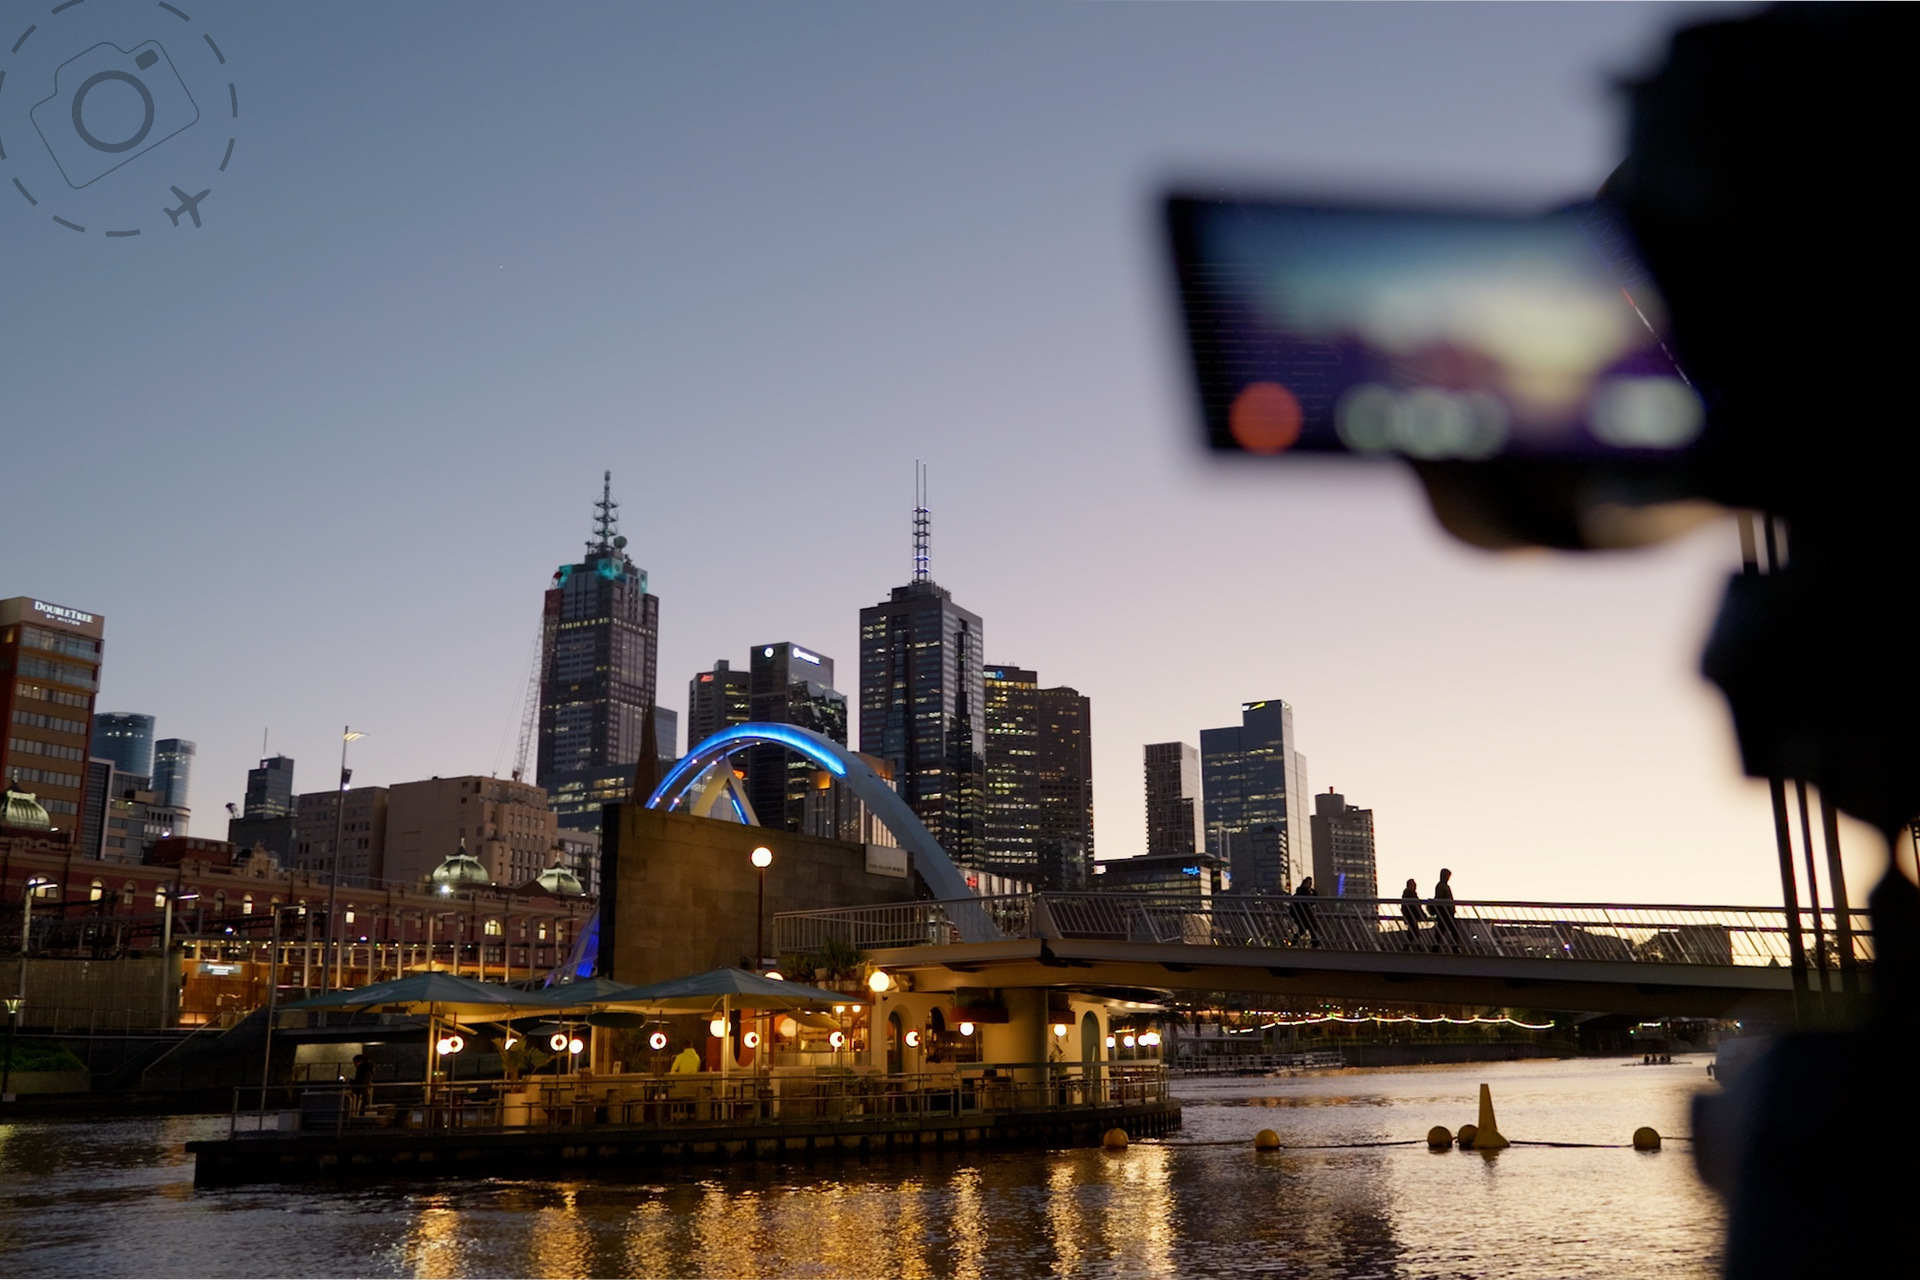
Let's look more closely at a typical twilight scenario and how to keep pace with the light as it changes. In the depths of the Melbourne winter, the sun goes over the horizon at around about 5.30pm. On a clear night, the sky will yield a strong dark blue about 20 minutes later. This is when the city lights start to shine brighter than the fading horizon. Higher in the sky and away from the west, that blue starts to take on a deeper tone. Over the next 20 minutes, the sky will move from blue to black. That means my time-lapse is limited to whatever I can jam into that 20 minute window. Once the sky has turned black, we have a proper night scene rather than a twilight moment. That's a narrow window I'm trying to hit just 20 minutes and the exposures are changing dramatically during that time.
Let's say you're capturing exposures at F8 with no ND filter. Your exposures on the sky just after sunset will probably sit somewhere around 1/60th of a second at ISO 100. Half an hour later, you may need a shutter of 5 seconds to get the same exposure. By the time our blue sky has moved to black, we're going to be closer to 10 seconds. So here's what I do.
I lock my ISO down to 100, I lock my aperture at F8, and I wait a little bit for the twilight to dim. I want to start shooting when my exposures are around about 1/10th of a second. Because by the time I finish, we're going to be out to 10 seconds.
The effect of varying shutter speeds is like a speed ramp on my time-lapse. It's moving slower at the beginning and then speeding up towards the end. This is not the end of the world and the effect actually looks pretty good. I think most people watching the scene unfold will be focused on the magic of twilight turning in tonight and not worrying so much about the speed of what's happening.
WIDE COMPOSITIONS
When I started this project, I was thinking a lot about variety in my scenes. I didn't want all my time-lapse sequences to just be clouds rolling through the landscape. I also wanted crowds flowing through walkways or the stop-go traffic flowing down streets or rowers on the Yarra at sunrise. I wanted to dial into the movement of the city in all its forms. Yet at the very beginning, I found myself consistently making one mistake regardless of what I was shooting. My compositions were too tight.
The more I stepped back and brought more into the frame, the happier I was with the results. I realised that I needed more room for movement in a time-lapse. I needed space to see the flows unfold. I needed to go wider even when I thought I was shooting wide. 18mm is my default lens for wide angle work. The little 18mm F1.8 prime by LUMIX is just so easy to carry around and I can pop the OKKO magnetic filters onto it. Super easy. But 18mm isn't always enough. Sometimes I wanted 14mm instead and for that I need my old friend the Sigma 14-24mm F2.8. This is one of my absolute favourite lenses I have ever bought. That flexibility not only to shoot ultra wide but to fine-tune the composition a little. This makes this an ideal lens for the job.
It's got a large dome front so my OKKO filters aren't an option here. Instead, it's got a rear filter slot and I have a little set of ND filters to match that I bought from Haida Swapping out these rear filters is a bit of a pain when you're in a rush, especially now that I'm used to the convenience of the magnetic filters. But 14-24mm is a sweet range for epic captures.
One other reason having a wider lens is important because your full frame mirrorless camera is capturing a 3:2 aspect ratio but your 4K videos are going to be trimmed down to 16:9. You're going to have to crop into that frame when you drop a time-lapse sequence into the timeline. On my LUMIX gear I can set up a frame marker that shows me the 16:9 frame in real time, so I can be on top of my compositions.
POST CAPTURE
One of the reasons I like shooting time-lapses as a sequence of raw stills is that I have amazing control over the final edit. I can correct for a wider range of mistakes in my exposure setup or push the creative direction further. RAW is great. Capture One is my regular tool but you can use anything you like. Darkroom, Lightroom, DXO, whatever.
I like to start with either the first or final image of the sequence and begin tuning the edit on that one file. How you want to edit the frames is a creative decision more than a technical one. In my case I usually want the time-lapse to match up with my existing video footage to fit in with my typical style. Sometimes that means I want to bring up the shadows a bit, fine-tune the white balance or just harden up a silhouette if I'm shooting back into the sun.
It's also a chance to clean up little floors that you don't want to carry through to the final clip. I might do things like clone out a telephone pole that's really annoying me. Make sure to pay close attention to removing dust spots that might have been hiding away on the sensor. These are usually much easier to clean up in Capture One than later on inside your video editor. For the most part I'm just applying a consistent treatment across the entire sequence.
I'm not looking to correct exposures between frames, not yet. If my files are for a 4K timeline then I'm going to output 6K files from Capture One. This just gives me a little headroom for editing and a little flexibility for post movement later. Now I drag those into DaVinci Resolve and bring it all together.
Just a quick tip, there's a setting in DaVinci's preferences where you can define how long a still image should be when you drag it into the timeline.The default is normally something like 4 or 5 seconds, but for time-lapse I want each image to be just a single frame in length.
Editing your raw files and sliding them into a video is not particularly hard stuff, but it does take time. Finding time just to head out and shoot was hard enough, and now there's extra work involved to wrangle the files and churn out some JPEGs. If you want maximum creative control, this is a great workflow. If you want something quicker and don't intend to handcraft the treatments, then S&Q is probably a better way to go from the start.
DAVINCI RESOLVE
If you're already making video content and just wanting to drop a few time-lapses into your production, then you'll have your preferred video editing tool already. DaVinci Resolve is my preferred tool for everything video. It's a powerful suite for editing and grading, for processing audio, plus has an amazing effects engine under the hood.
There's a free version so you can get started right away at zero cost. Learning DaVinci from scratch is super complex however, it is a lot to take in. Thankfully there are tons of super tutorials on DaVinci all over YouTube.
Once I have my images into my timeline, this is where we get to fine tune things like exposure flickering, issues with stabilisation, maybe cloning out some objects or applying further smoothing effects such as motion trails or motion blur. When I'm working in DaVinci, most of my tune-ups will be happening in the colour window. Deflicker is a big one for me to smooth out those transitions, and stabilising a long sequence is also necessary sometimes. If I'm shooting with a telephoto lens or standing on a bridge, I might observe movement from frame to frame.
There are a lot of ways to stabilise a scene in DaVinci, and mostly they are intended to deliver a smooth finish to janky movement. The jitters I've seen from standing on the bridge was irregular and annoying, so I ended up using the "planar tracker" in the Fusion window to lock down my cityscape.
The important thing to note here is that there are multiple ways to fix up the little glitches you're experiencing. So what we're really doing is just polishing up the footage we've already got. So it really really helps if you have an oversampled 6K clip to begin with. Shooting stills and fine-shooting the treatment before sending 6K files into your video editor gives you lots of headroom to refine the sequence. Plus, composing scenes a little wider than you needed gives you options when you get to editing, gives you room to apply stabilisation, and you can tinker with things like dynamic zooms and panning.
All of this is merely tinkering on the edges though. What really matters is having some nice slow exposures when capturing and a nice long sequence to draw from. Once you have that foundation, you can enjoy your time post-processing the clips and fine-tune them to suit your style.
Tools such as DaVinci Resolve are very powerful, but they are also very demanding on your computer. Once you apply one or two special effects, you might find that smooth 4K playback starts to joke a little. One trick I employ is generating renders in between the effects. I'll start with my JPEGs dragged into DaVinci as a sequence, group that into a compound clip, and maybe apply some deflicker or colour grading. Then I do a "render in place" to generate a new movie clip, which contains all my first round of edits and effects applied. This rendered clip will play back super smooth, and you can start putting new effects onto that one as well.
It's worth noting that many special effects won't work at all when you drop them onto a JPEG series. You need to render out a video clip first before seeing the effect from Motion Blur or Motion Trails, for example.
There's a lot of fancy things I can do with software like DaVinci. Mostly I don't want fancy though. I don't want anything to distract from the immersive experience of my time-lapse. I just want it to look natural and look smooth. Let the viewer enjoy being in that space for 10 to 20 seconds.
IT TAKES TIME
It really does take time to master the art of editing your time-lapses. It takes a lot of time to capture them in the first place, so you want to honour that initial effort and follow through on the post-processing. This is about fine-tuning the sequences though. Processing is a lot more satisfying if you made the most of the captures in the first place.
Capturing a good time-lapse sequence is a time-intensive task. It takes time to stand around waiting for some clouds to move through the horizon. It takes time to show up for sunset day after day waiting for the right sunset. It takes time to set up your ND filters to deliver nice slow shutters. And you definitely do not want to rush the 180 degree rule.
The other thing I don't want to rush is spending time with my friends. I look back on my captures across this project. There's a few highlights in there. Mostly they are when someone came out to join me, like spending an entire day out shooting with my mate Ian, or taking shelter from the storm with my mate Andy. Not every solution to better photography involves new gear or a new technique. Sometimes it's just a matter of hanging out with the right people.
– Ewen

Keep Reading
Join Ewen's newsletter for monthly updates on new photography articles and tour offers...Subscribe Here