


My wife is a recipe developer and food photographer, so consistency is critical for her work. Being able to dial-in the right lighting at 5pm, 8pm or 11am is essential for her. When I first suggested to swap out her existing Elinchrom setup for an experimental LED rig I got some very funny looks. If it ain't broken don't fix it.
There are few downsides to flash lighting. Our rig is a decade old but still delivers over and over. We get a few more mis-fires than when it was new, especially on hot days when a client is breathing down our neck, but the monobloc design of the BRI/D-Lite systems by Elinchrom are easy to pack, easy to setup and give a lovely full colour spectrum. What they can’t do is video, and every now and then we compile short clips for Shellie's clients that take advantage of the high-speed capture features on the Lumix cameras. And for that, we need a little more flexibility in our lighting setup.
The goal of having one lighting setup that can work for *both* stills and video seems ambitious at first, but not impossible. It comes down to a matter of scale. It can be done.
In recent years the technology around LED and flash gear has stepped forward dramatically. The quality of light production and reliability is very good now, and the price is good too. That flash tube in our Elinchrom has been the biggest headache since day one. When I bought the kit there was a fault in the tubes supplied, which the supplier promised to rectify. It took them three months and the customer service was appalling. Since then we’ve been reluctant to go back to that dealer, and now the tubes are ageing and gradually failing under stress. LED is the way to go.
There are now lots of good flash systems that harness LED technology, but our ideal setup is to have the same lightboxes for stills and video. I didn’t want to run two separate systems, and didn’t want two sets of light shaping gear. We often focus on the strobe itself when talking flash, but in fact how you shape the light is just as important. We already had a bunch of good gear after a decade using Elinchrom, so wanted to avoid waste.
Light vs Lighting
I have often found that video dudes and stills dude see lighting and gear very differently. There’s a price sensitivity in the video market that pushes budget gear to the front, more so than stills. Video guys also cost their work differently and it’s a common feature to include the rental cost of equipment in a quote. I think this is a very 1990s approach to customer relationships and times have changed, but this habit does persist.
Video guys have a more cavalier attitude to lighting compared to me in general. I like to get it right in the studio and have minimal processing afterwards. “We’ll fix it in post” is a phrase I hear way too often commercial shoots. For me the light is *everything*. It’s the character and mood and quality and inspiration. I like to create the right character in the studio context, but I let the character of light guide me in the travel context.
I know what light works for me, so I just want to replicate that with LED and continuous lighting. The ideal results for me are soft, abundant, angled.
I found a few variations on a theme in the continuous lighting world. A couple of rigs that have dual light sources, one for high speed flash and a second for continuous video, came up in my research but they were never the best of their range. Adding the two functions together seems a half-way solution. I just want a good continuous light source that will allow me to shoot stills. The big name is this space is "Aputure", who have been designing portable and powerful lighting rigs that can be run off vary large batteries commonly used in video productions. I was keen to see hands on what they offer, and dropped into Borges to have a first hand look. Build quality on the Aputure Lightstorm C120D MkII was excellent and the design works as advertised. [ A quick thanks to Borges too for being very helpful and very friendly, would definitely recommend to people to visit and say hello if you’re shopping for gear. ]
The problem with comparing a source like Aputure against your exisiting flash is the power output. Continuous LED offers way less light than the most basic of flash rigs and trying to compare these two realms is a nightmare. After a decade of shooting with monoblock flash strobes I have a good idea how much light I need, and can pull, from a rig. Even a 100w flash strobe will give me ten times what I need for still life and food photography. So it stands to reason that a continuous LED rated at 100w would give me plenty of light too right? Wrong. It’s not even in the ballpark.
So the question becomes how much light is enough light?
Powered Pixels
There was only way to find out, and that’s to give it a try. For $500 I got myself a "Pixel Fodavil 5600K C100" with a Bowens S mount. This is essentially a cheap copy of the Aputure design that skips the battery mounts and a few other features. It’s a simpler setup and cheap enough that a failure to perform wouldn’t put me $2000 out of pocket. I really wanted the 300w version, of either Pixel or Aputure, but shopping during a pandemic has it’s limitations. We also looked at a really interesting LED called the Fiilex P360. These are dead cute little battery powered lights that are supremely portable and pack a punch for their size, but not suited to fixing the chunky lightboxes we have in studio.
The Pixel C100 uses a Bowens mount to attach light shaping, and all our gear is Elinchrom. For $70 I ordered a new mount that takes the Elinchrom softbox and plugs directly into the new strobe, and it was a quality item made by Elinchrom themselves. If you’re starting from scratch there are LOTS of budget friendly Bowens mount light shaping gear on the market, mostly from cheap Chinese knock-offs. A friend also gave me a Bowens mount softbox to try out for this story, and I was reminded just how nice the Elinchrom attachements are!
Our C100 cranked to 100% power gives just enough light to shoot our food photography, depending on how good you are at processing high ISO images.
If that last statement gives you cause for concern then you assess the situation correctly. I say concern, but not panic. High ISO is not ideal but is far from the end of the world. When shooting on location we routinely push out to ISO 1600 or even higher and nobody is any the wiser. The sensor capabilities of the Canon 5DSR (Shellie’s workhorse) and my Lumix S1R (my workhorse) give us 50MP of detail with no drama at high ISO. We also process in Capture One v20 and have quick and easy access to noise tools, although realistically our defaults are more than adequate and we nearly never give ISO a second thought.
Keep in mind that for food and portrait work we are typically shooting a f/2 with a very fast 50mm lens. So we have a lot of light capture through the lens, and still need ISO 1600 to get the shot. In contrast our conventional 100w strobe flash gets dialled down to minimum power and often we find ourselves with too much light at f/2.
Practical Matters
There are several differences when shooting with continuous lighting, not least of which is the shutter speed. With regular flash the shutter speed is irrelevant, because the duration of the flash itself is very very fast. The moment freezes and you have no issues with camera shake. Continuous light brings back the relevance of shutter speed, so capturing at 1/60th of a second may lead to a blurry shot if you’re not mindful of your own movements with camera in hand.
Shellie still uses her Canon DSLR for studio work so one drawback with flash for her is the live-view on the Canon. It wont trigger the flash in live-view, so all of a sudden the continuous lighting allows her to capture with a little more flexibility. What you see is what you get. Creatively this is a major difference, whether looking through the lens or not. When you look at the scene before you are seeing the real actual light for capturing. Flash only reveals the nuances of lighting after you hit the shutter. If you’re just starting out on a journey of food styling and photography, this may be a significant consideration to help you step into a creative frame of mind more quickly.
Not having a flash firing and beeping all the time is another small bonus. These shoots feel less “busy”, more gentle and relaxed. When we’re ready to shoot the light is already in place and we just take the shot. It feels exactly like being on a location shooting with natural light. We don’t have to worry about misfires, dead batteries in the radio trigger or disturbing the neighbours at 7pm at night with strobes of light.
We’re working at the margins for stills with the Pixel C100. I would have loved the 300w version to bump up the wattage a little, but we’re getting by. It’s been several months now and Shellie has been seriously busy producing recipes and photos, and the images sit side by side the older strobe-based shots with no discernible difference. The one major drawback for Shellie is her “top-down” perspective, which she usually prefers to roll out to f/8 and capture. With conventional flash strobes this is no issue, just punch in 50% juice instead of minimum and you’re good to go. The continuous LED of the Pixel C100 at 100% output is giving us high ISO while shooting shallow at f/2, so we’re forced into a compromise here.
Take a look at Shellie's reshoot this month of the Teriyaki Salmon with Soba Noodles to get a feel for how good this lighting regime works:
https://ironchefshellie.com/2013/04/03/teriyaki-salmon-with-soba-noodles/
Ready Camera Action
The entire point of this exercise was to add video more seamlessly into our workflow, and the Pixel C300 has given us a really flexible setup for that. I have no intention of becoming a video expert, I need to point that out right now. But I enjoy many aspects of the medium and have especially enjoyed using the high-speed frame rates on the Lumix G9, S1R and S1H. These cameras can capture Full HD video at 180fps, which translates into some serious slow-motion joy. I’ve used this when travelling in the Himalayas to document our journeys, and loved it. For me it’s like capturing a still image that happens to be alive. Slow-mo output from a high-speed capture fits with my aesthetic.
We brought this into the kitchen studio as well. The first time I tried to wangle some lighting for high-speed video capture I quickly discovered that ordinary LED lighting doesn’t cut it. Flickering at speeds above 100fps was the problem, and without very stable lighting frequencies you end up with unusable footage. These professional grade LED lights are designed specifically to avoid flickering. Happy to say my $500 Pixel C100 delivered on the flicker free.
I should add that these lighting rigs are also designed to be very quiet. They assume you will be recording audio on set and hence the cooling design has to be effective without being loud. It’s the middle of winter in Melbourne so we’re not pushing the cooling system of the Pixel C100 in the slightest. I’ll add a note here in Summer when next we end up doing a day-long shoot while it’s 40C outside.
See below for a taste of why we wanted to get this lighting rig setup, and make it as non-technical as possible. Studio lighting shouldn’t need a 2-year course to get started with, it should be simple and allow you to focus on the creative process. There’s a lot of ways to achieve a result, but for us we’re more interested in having a flexible and workable solution that we can tech to others. One that doesn’t cost a fortune to try out. The Pixel C100 or C220 is a good place to start.
Take a look at our yummy friends at Rice Kitchen!
ricekitchen.com.au
Discover how to make Kanelbulle with Shellie
https://ironchefshellie.com/
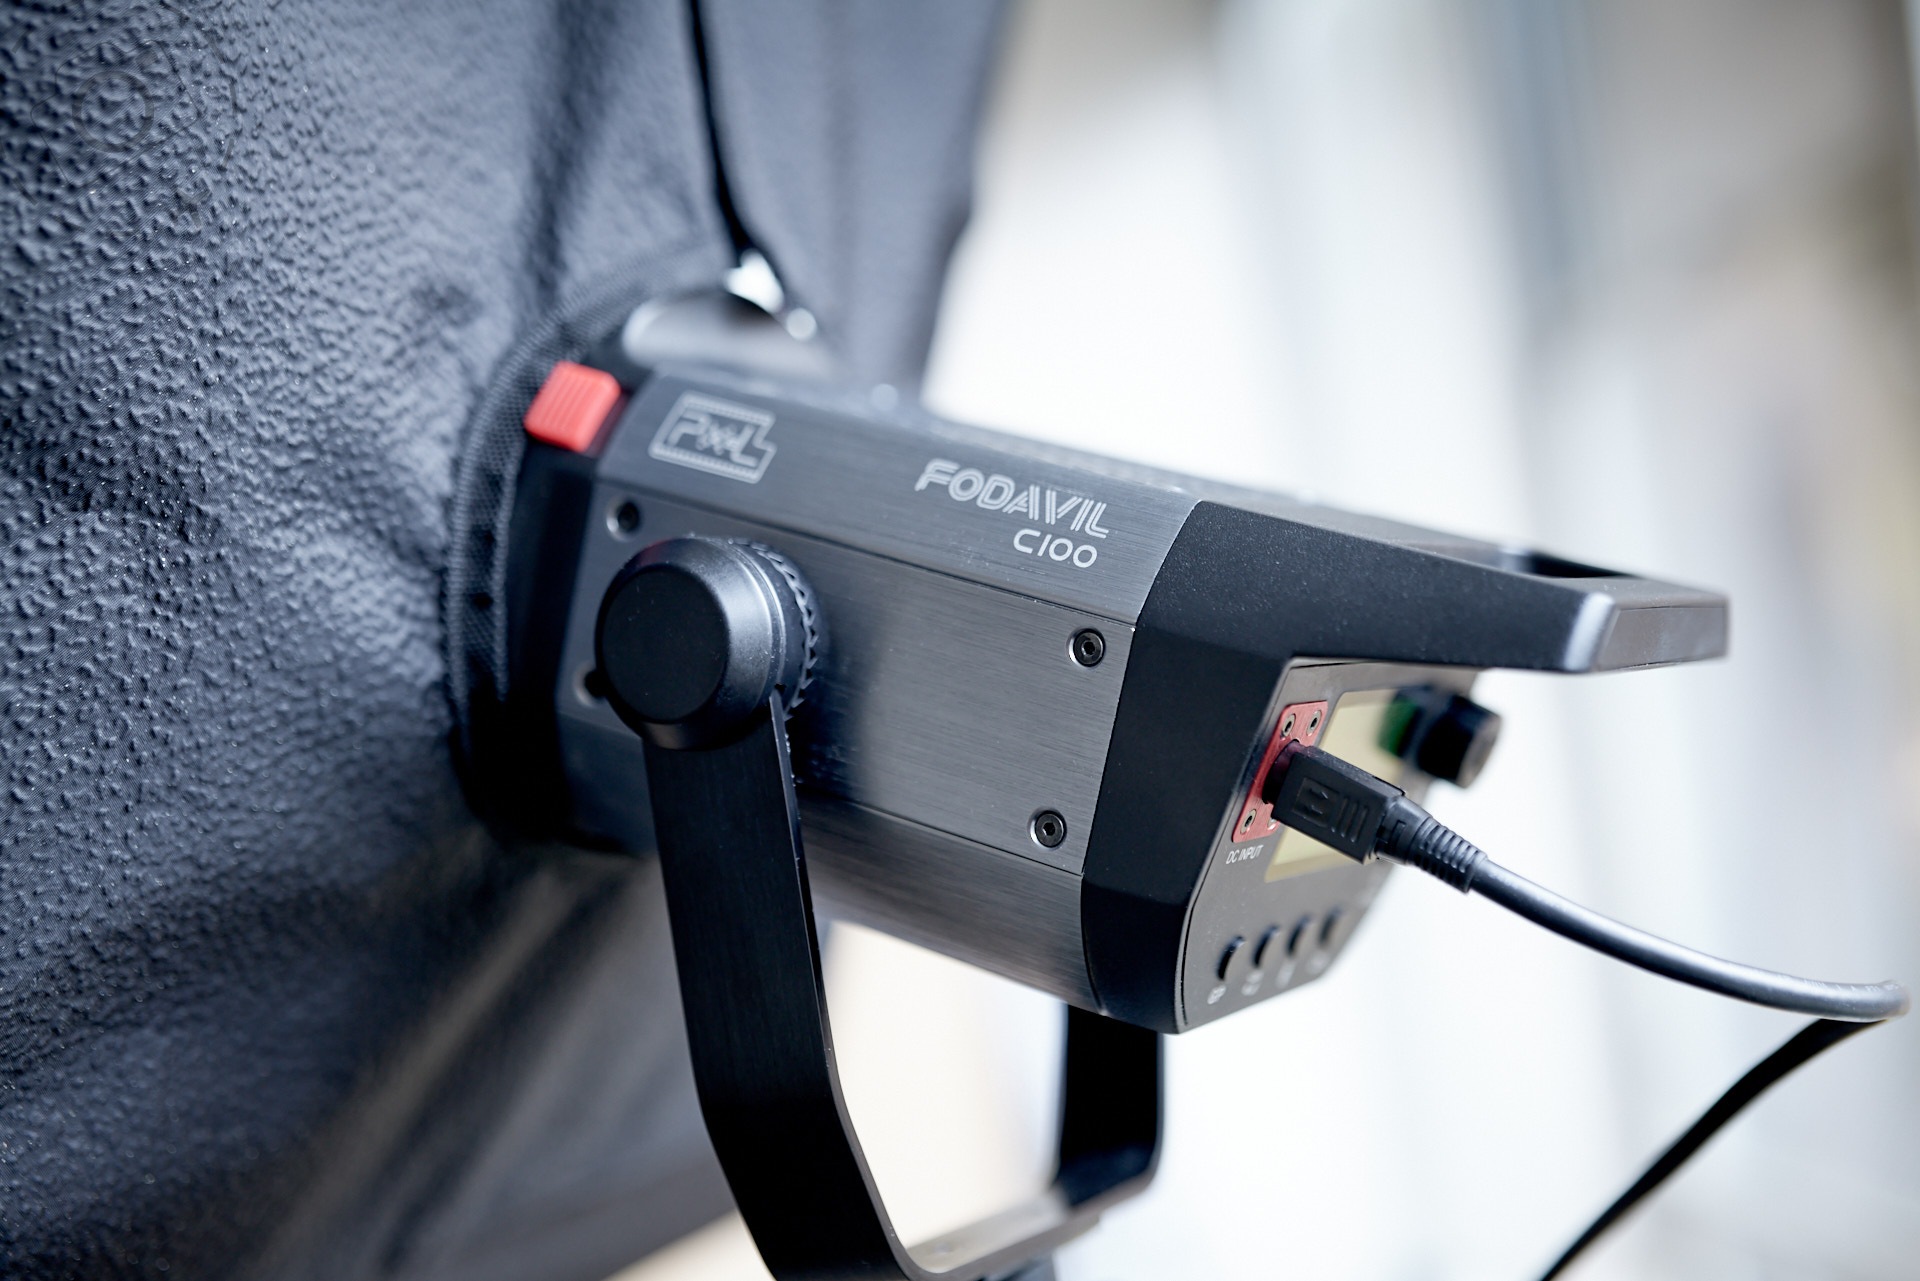
Quick note on the Pixel Fodavil C100 used in this article. They are hard to come by and ideally I would have tested the bigger 220W version. Actually right now almost every continuous lighting rig I have researched seems to be in short supply. So order ahead for when the next shipping freight lands. The Pixel is really excellent value for the money and comes with a half-decent carry bag as well. I was a little disappointed in having an external power brick, after a decade shooting monobloc, but at least there's a useful bracket to keep it mounted to your c-stand and out of the way. If you think portability is useful though the Aputure is a great system – just get good advice on the v-mount batteries to power it because these things suck the juice.
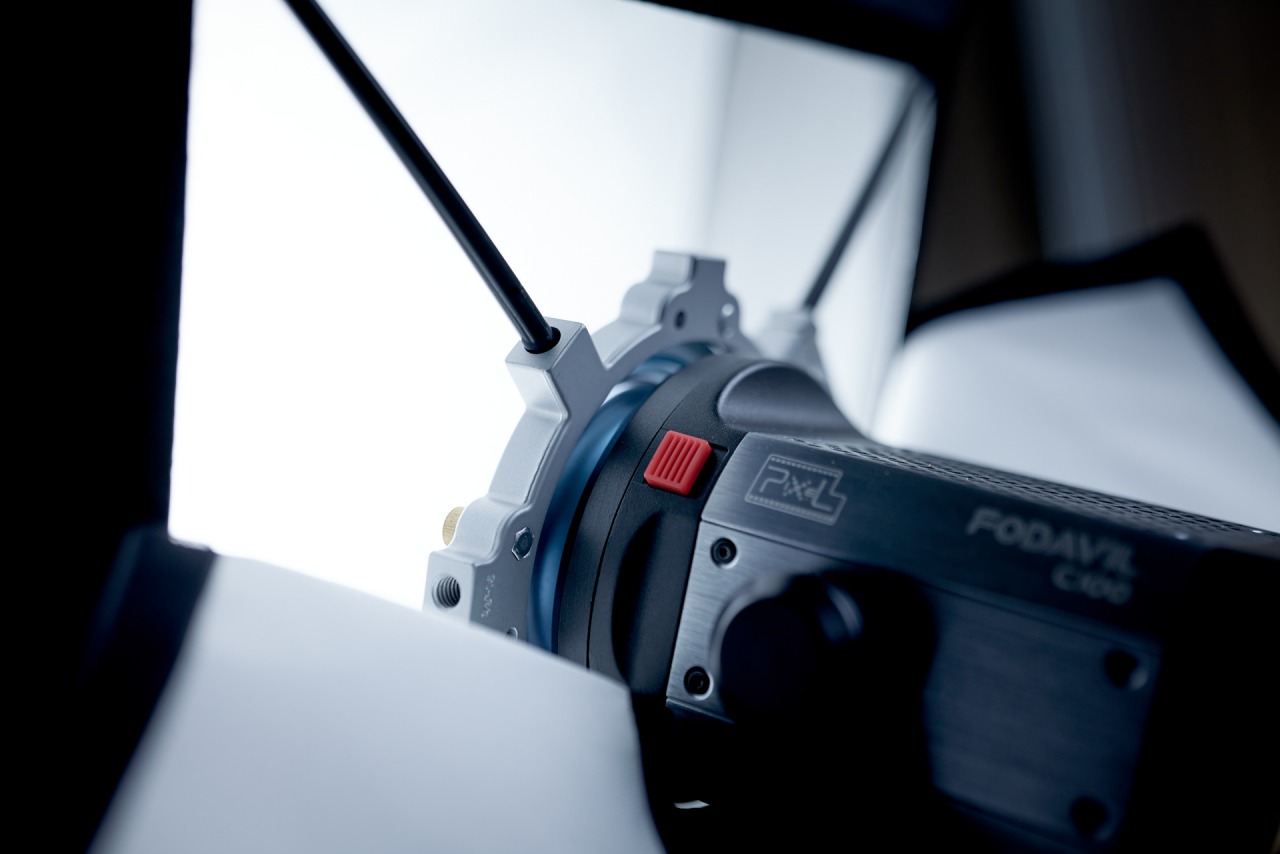
Pixel C100 / Bowens S Mount
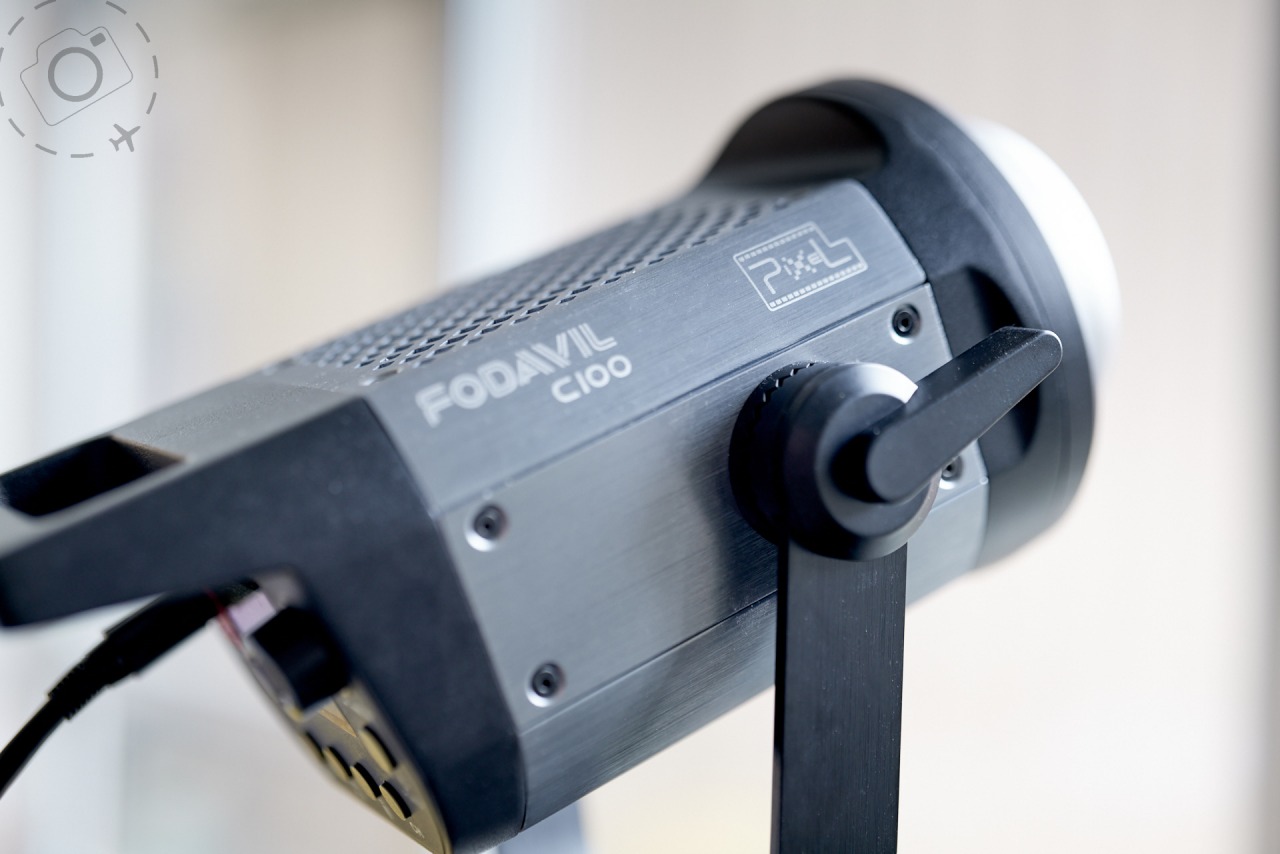
Pixel C100 / Rotation Lock
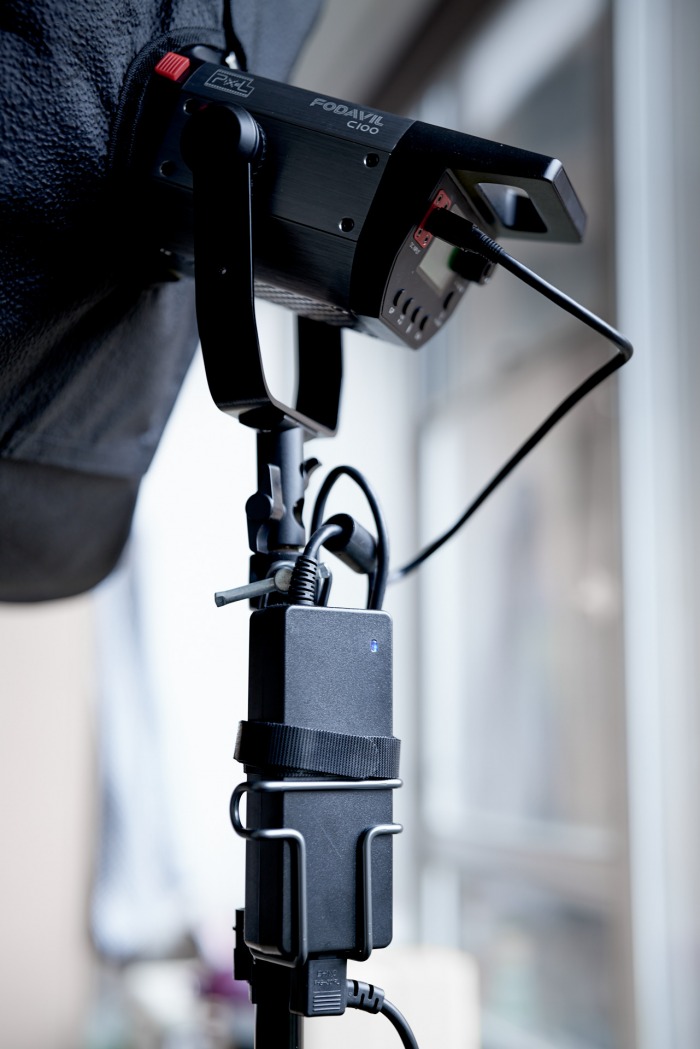
Pixel C100 / External Power Supply

Keep Reading
Join Ewen's newsletter for monthly updates on new photography articles and tour offers...Subscribe Here