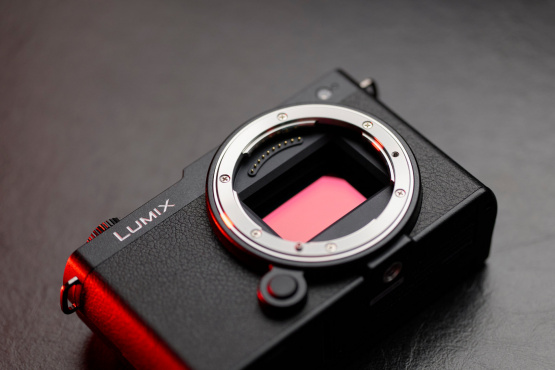
I’m a professional photographer. I have two decades of RAW files, of which a large number are still yet to receive the care and attention they deserve. And yes, by care and attention I mean “which ones should I delete, they are clogging up my hard drives”. In truth the old photos from my travels in China are not a big problem. Camera sensors were smaller back then, and I took less photos over all. Relatively speaking, the old stuff gets smaller and smaller as the disks get bigger and bigger. The real problem is the images I will be taking in future, and making sure I have room for that.
In summary, here is the problem. I have a lot of files and will continue to capture many more. I would like to make sure they don’t disappear if a disk fails. I would like to make it easier to find the right image when I need it. I would like super fast access to two decades of work. And I need a lot more disk space in future than I need today.
Now let’s look at solutions.
NAS + RAID
RAID is an acronym for “Redundant Array of Independent Disks”. The key word here is REDUNDANT. Lots of disks alone is not a solution, not unless there is redundancy built into the design. Let’s take an example of 8 drives in a RAID-6 configuration: 2 of those disks are redundant, but active. The net physical space is equal to the remaining 6 drives. The magic of RAID means that any two drives in the box can fail, and you still have ALL of your data. Or to put it another way, when the first disk fails you have time to act before things turn catastrophic.
The other sweetener to having a RAID-6 box with tonnes of disks is that you can read and write to multiple disks at the same time and in the process save a lot of time. Regular hard drives deliver about 100MB/s data flow. Drop 8 of those behind a single controller and you can nudge throughput towards 800MB/s. That’s double the speed of a decent SSD, for a lot less money per Terabyte.
NAS is an acronym for Network Attached Storage. This means that instead of plugging the box directly into your computer, you access the drives across a network. Wireless, ethernet, whatever. You access the internet across a network too, so accessing data storage in the same way is no big deal. You might already have an NBN or ADSL box in a cupboard somewhere, which allows your laptop, iMac, smartphone and TV to access online at the same time. You can add a NAS box to your home network also, and access the same files from various devices.
Most NAS boxes offer some flavour of RAID. You can get little ones with just two drive bays, or the chunky variety of 6 or 8 bays. I bought one with 10. More about that later hey. RAID is the magic inside the box which keeps the files safe in case a drive dies. NAS is the magic that allows your computer to access EVERYTHING on your storage that sits in a cupboard out of sight.
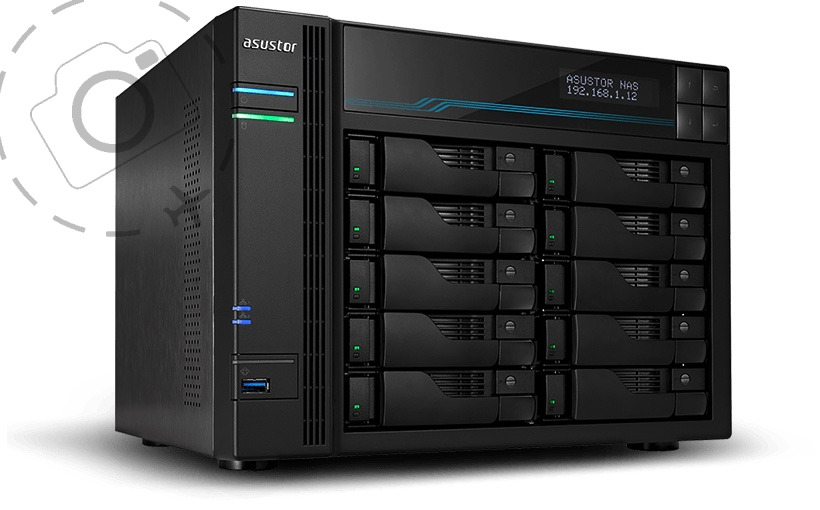
Asus Lockerstor AS6510T
Sharing Is Caring
I make NAS sound trivial. I would say that though, as a geeky dude who has lived and breathed Information Technology for most of my life. If you’ve ever worked in an office of some kind you’ll have had some exposure to the idea of files that “live on the server”. You may not have been so keen to invite such a demanding level of technology adoption into your home though.
Installing a NAS box these days is pretty easy. They make it simple. Power on, follow instructions, pick the default settings, load in the hard drives, sit back and wait for the little lights to go green. Windows and Macs are both well catered for when it comes to “file sharing”. You type in a password, things connect and there’s a 48TB volume awaiting your every command.
For most people in most situations, SMB/SAMBA is the next keyword you’ll get to know. SMB is a file sharing protocol that most computers support, and most NAS boxes too. I tested a tonne of options for getting better speed between my iMac and NAS, and there was little to gain by moving away from SMB. It’s easily the most reliable and trouble free, and most NAS boxes will make it easy to configure this flavour of file sharing with a degree of security and flexibility. Performance with SMB can be disappointing, especially for smaller files. 100gb of movie files might need 3 minutes to move from desktop to server (at 10GbE speeds), but 100gb of word documents might take more than 15 minutes. Lots of small files are just slower.
That’s bad news for photographers. Capture One in sessions mode creates a subfolder containing the masks, edits and indexes for each image. That’s a lot of small files. Same goes for the catalogue or library, in Lightroom or Capture One. These are in fact “flat file databases”, only the operating system typically keeps all those little files hidden from sight. But more on that later :)
I also did a deep dive into the world of iSCSI, which I mention here only for completeness. It was a real nightmare on the Mac. The iSCSI clients are fickle, clunky and in one case near useless unless you enjoy rebooting several times a week. Worst still, the dropouts caused by iSCSI drivers on the Mac or dodgy network controllers by QNAP can lead to corruption of the iSCSI volume itself. The entire point of running a NAS box is data security, so corrupting very large volumes with zero warning is not my idea of a good time. In short, iSCSI is superbly fast when it works, and supremely tragic when it doesn’t. Stick with SMB.
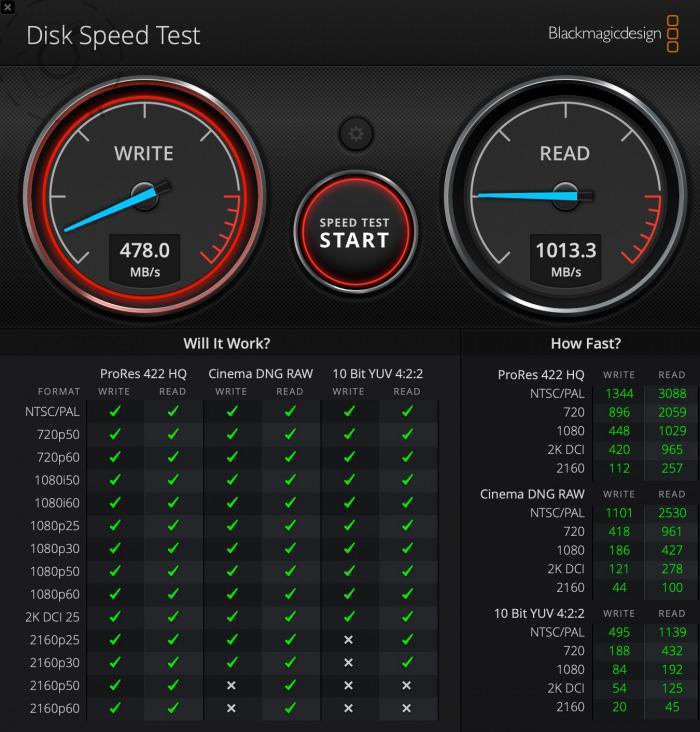
Read speeds vs Write
Faster Horses
When you have a NAS box, the speed of your network suddenly becomes important. Most people use WiFi at home. Why wouldn’t you of course, given it’s easy and tidy and most internet services come supplied with a WiFi router anyway. But WiFi is typically not very fast, even when it claims to be.
WiFi-6 is the latest and greatest WiFi standard, running up to 5 times faster than anything that came before it. In theory it offers 10Gbps speed, although in reality 2Gbps is more like what users will experience. On a good day. So how fast is 2Gbps anyway? First thing to note is that networking speeds are usually quoted at mbps (mega BITS per second), while disks use the MB/s format (mega BYTES per second). Big difference. 2Gbps WiFi speed is about 250MB/s in data terms, not accounting for the overheads associated with network protocols. That makes it slower than an entry level SSD, but faster than a typical hard disk.
If you’re thinking I’m underwhelmed then you’re right. You need a super grunty WiFI-6 enabled box, plus you need your computers to be modern enough to support the new WiFi-6 standard, plus you need optimum conditions to get anywhere close to these mythical Giga-bit speeds. The only Macs which are WiFi-6 enabled are those with the new M1 chip.
Meanwhile, even your old intel iMac already has an ethernet port at the back which most definitely does support Gigabit network speeds and reliably so. If you are able to plug in a quality network cable from the iMac to your NAS box, or connect both to a gigabit router (many WiFi routers offer this as standard) then you will definitely get 1000mbps (100+MB/s) over the wire.
Thunder Bits
You can go faster than NAS. A stand alone RAID box that supports RAID-5 (one redundant disk) or RAID-6 (two redundant disks) that connects over ThunderBolt will be at least 5 times faster than Gigabit network speeds. USB offers 5-10gbps, Thunderbolt-3 can now go up to 40gbps. Stand alone RAID boxes also have less to go wrong in terms of internet security. If your Mac is safe (anti-virus etc) then your RAID is equally safe. The downside is that you can’t access from multiple computers at the same time, and you have a potentially very loud bunch of whizzing disks clicking and whining at you from just a few feet away.
Gigabit ethernet can run across a cable for 20 metres no problem. You can stash the NAS far from sight and mind, and access over WiFi when speed is not an issue. ThunderBolt struggles beyond the 1 metre mark. There are good options for ThunderBolt RAID boxes up to 4 bays, but after that the options get harder to find and expensive. NAS is king if you want 8-10 bays, and the speed that brings. Some NAS boxes do support direct ThunderBolt connections as well, but they tend to cost a premium.
The other options is 10GbE. This is like gigabit ethernet, but 10x the speed. Many NAS boxes now have 10GbE built-in or the option to upgrade the network interface. I went down this path, and chose a NAS box specifically for this feature. The fastest data I can expect from the drives inside is 1000MB/s, and that’s about the same for 10GbE. They’re a good match. I had two options to make this work though. Firstly I can plug directly from my iMac to the NAS box, or I can buy a very fast 10GbE switch and plug everything into that. More money, more cables to plug in, more heat inside a tiny little cupboard shelf. Naturally I chose the option that keeps the office warm through those cold winter days.
Just one hiccup. If you bought the top of the line iMac Pro you get 10GbE built-in. If you bought an entry level iMac in 2018 when they were being cleared cheap before the new models arrived, you don’t. You get regular gigabit ethernet built-in and some thunderbolt ports. So now I go shopping for a 10GbE adaptor to plug into my thunderbolt. These things are expensive. These things are ugly. These things run hot. I had already experimented with a partial upgrade, buying some 5GbE adaptors from QNAP. They were rubbish. They ran crazy hot, they dropped off when you push the data, and you never got close to 5gbps throughput. Do not recommend. The price tag on the proper 10GbE adaptors was crazy, and the availability during a pandemic was next to zero.
I ended up buying a model from OCW online, on special, and including shipping was on my door step 3 days later for AU$250. It worked right out of the box, didn’t have any of the flakey issues of the QNAP, and while it was very warm it never felt like it might fire to things. Under optimal conditions I did indeed manage to pump data from my iMac internal disk (SSD running 3,000MB/s) to the NAS box with just over 1000MB/s on the wire. It actually worked. But more on that later.
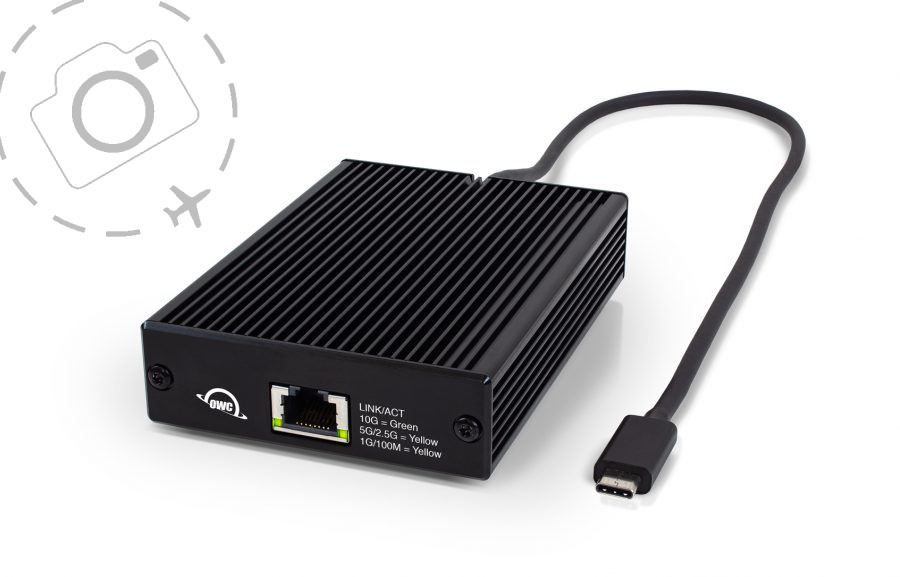
One of the ugliest Thunderbolt adapters known to mankind
Capture One Is Great. I Hate It.
So far I’ve focused on the physical achievement of getting very fast access from my iMac to a RAID-6 volume inside a NAS box. Now let’s focus on making that volume + speed do something useful. I already had 20TB of photos on my drives, all processed with varying versions of Capture One and all with their edits and indexes nested in sub-folders. For Lightroom users, you can think of this as the “sidecar” option. Next step was to take all those images and build one mighty great catalogue.
Capture One is a great bit of software, and I hate it. In a race to add features and compete with Adobe, they keep breaking stuff that I rely on. Buggy issues like my M1 AirBook suddenly throwing silent rendering failures when exporting are just devastating in a commercial workflow. One day it’s working fine, the next it’s misaligning heal+crop layers. If you’re not paying attention, you could easily end up sending a client dropbox folders full of broken images. Randomly broken, in a way that they may not realise themselves until months later. As much as Capture One annoys me, Lightroom is worse. I see what people struggle with on my workshops with Lightroom and I just wont go there. Adobe are a marketing company, not a software company.
Anyway, we were talking catalogues. These things are great. Even when stuffed with 100,000 entries they are great. Not perfect, not snappy, not instantaneous. But they do the job and the workflow is genuinely easier and faster than the old method, where you swap the session from one tome of images to another. The key is to break up the catalogues to keep the collections down to 100,000 images or less. Sometimes easier said than done. For me it’s a minor tragedy too, as I really wanted to be able to search across THE ENTIRE COLLECTION in one hit, rather than pulling up Scandinavia or The Outback alone.
A friend of mine named Paul Diamond made a really good point about a well set up DAM tool (Digital Asset Management). He said you don’t need JPEGs at all. You go into the catalogue and find what you need, and output what you need. Don’t leave the JPEGs lying around. Capture One will do that for you. In my case the NAS storage of my RAW files is often preloaded with Hires + Lowres folders. So it only takes 30,000 frames to hit 90,000 items in a catalogue.
There is a way to instruct the import tool to ignore the movies files, jpegs and other specific formats you may have lying around on the NAS – You have to locate the "Advanced Search" dialogue and specify what to exclude. It's a fiddly and obscure method that was designed by geeks. The alternative is to quickly filter in all the JPG files for an entire catalogues and purge them. I just wish Capture One would make it easier to focus on the RAW files only in the first place.
I’ve been way too busy with client work this year to actually spend quality time with the contents of my catalogues for the most part. I had lofty ambitions of finally sorting through my China adventures from a decade ago, or editing some of my Uluru pics to get them approved for media use. Yeah nah. There was one instance when the catalogues really made an impact for me, in between other work. I was running a bird photography presentation for Panasonic Lumix last month and wanted to quickly look through bird shots taken on my Lumix G9 during recent Outback trips. I already had my Outback catalogue setup so it took just seconds to step into those images and find what I needed, and then generate HD sized images to Dropbox for my slideshow. Perfect.
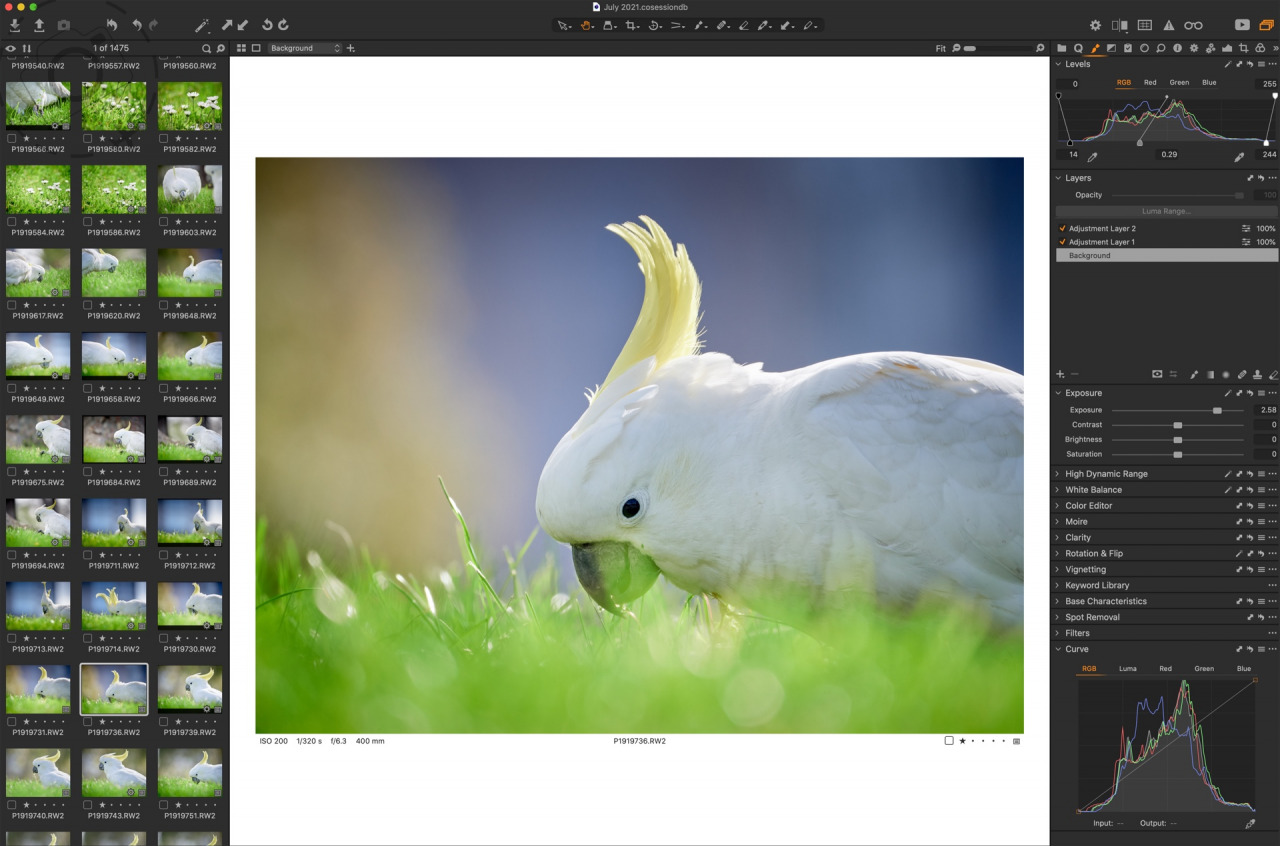
Effective access to a LOT of files
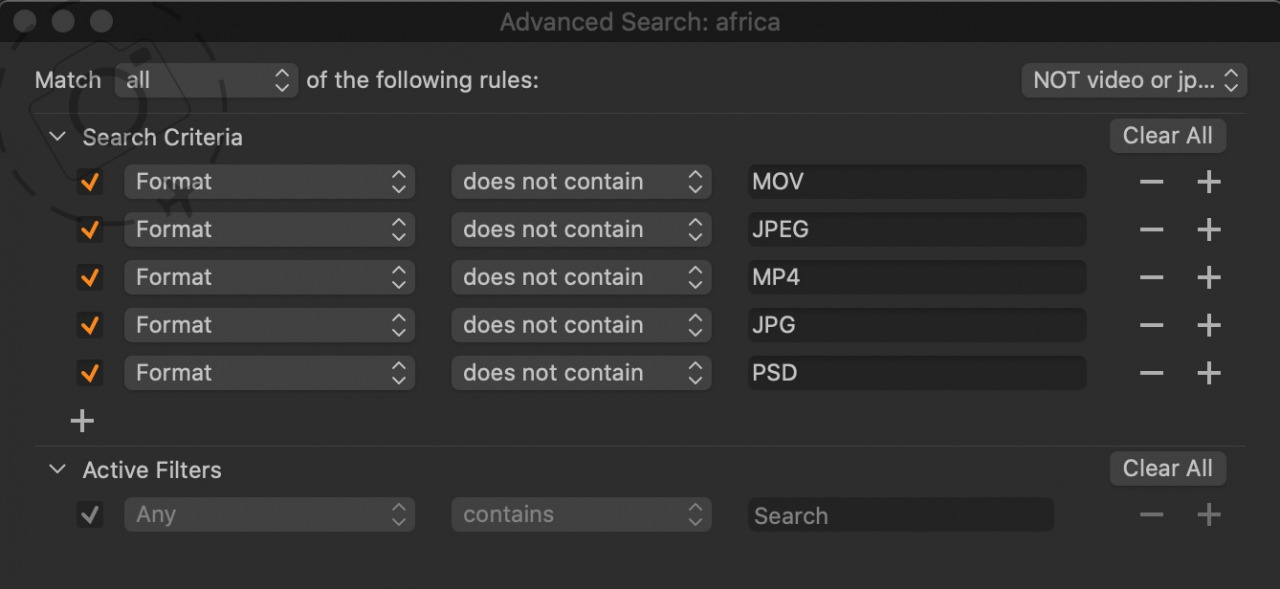
Workaround to exclude non-RAW imports
Catalogues Are Great. I Hate Them.
Building a catalogue is painful. This is where Capture One need to rethink what they’re doing, because there must be a better way. If they can find a proper efficient way to generate catalogues, the world of DAM could be revolutionised. As it stands, you need patience and dogged persistence to keep at this for very large collections. And let’s face it, VERY LARGE COLLECTIONS is the entire point of catalogues!!!
Step one is to have a chunky SSD handy for the catalogue. Never build directly onto the NAS box. I ran a tonne of tests to get the most out of my hardware, and even got help from a friend-of-a-friend who is waaaay geekier than me. Capture One catalogues are slow to build. Very very slow to build. Moving to a fast computer did NOT make the build go faster, indeed Capture One was not using the GPU at all and on a 16 core machine it was using 25% of the grunt available. I have 64GB of RAM on this Mac too, so there’s a bit of room to crunch with. Despite all this, it can take DAYS for a catalogue to complete over a gigabit network. When I moved up to the faster 10GbE thing might only take a day and bit. Yay.
Sometimes you would have to restart the ingestion. An import would fail or choke or Capture One would crash and you restart the application and import again. It speeds through the ones it already ingested, then slows down to begin the new ones. At the end of the process you might have 50,000 RAW files in a single catalogue. Depending on how chunky you want your thumbnails in the catalogue (the index or preview image) that SSD can fill up quick. My iMac has a 5K display, so I set my previews to 5K as well. With such a generous preview size, 50,000 images in a catalogue might need 150GB on your SSD. Maybe more.
Catalogues also give you the ability to work offline. You can take that SSD and plug into a laptop and sit on the train ride to Perth and do processing and key-wording. When you get home and reconnect the network volume, the catalogue will sync your changes with the original sources. It’s quite powerful. I haven’t seen a big difference between 50,000 and 100,000 images in a catalogue. Building is slow. Running is fine. When I’ve done all my catalogue work I copy them off the SSD onto a NAS folder. That way they’re safe (RAID = redundancy) and when I get a chance I’ll do some more work with them.
The catalogue interface in Capture One is very powerful. It has some nifty features that make sense, such as relinking a folder in the catalogue when you move the files to a new disk or server. It's on the verge of seriously brilliant.
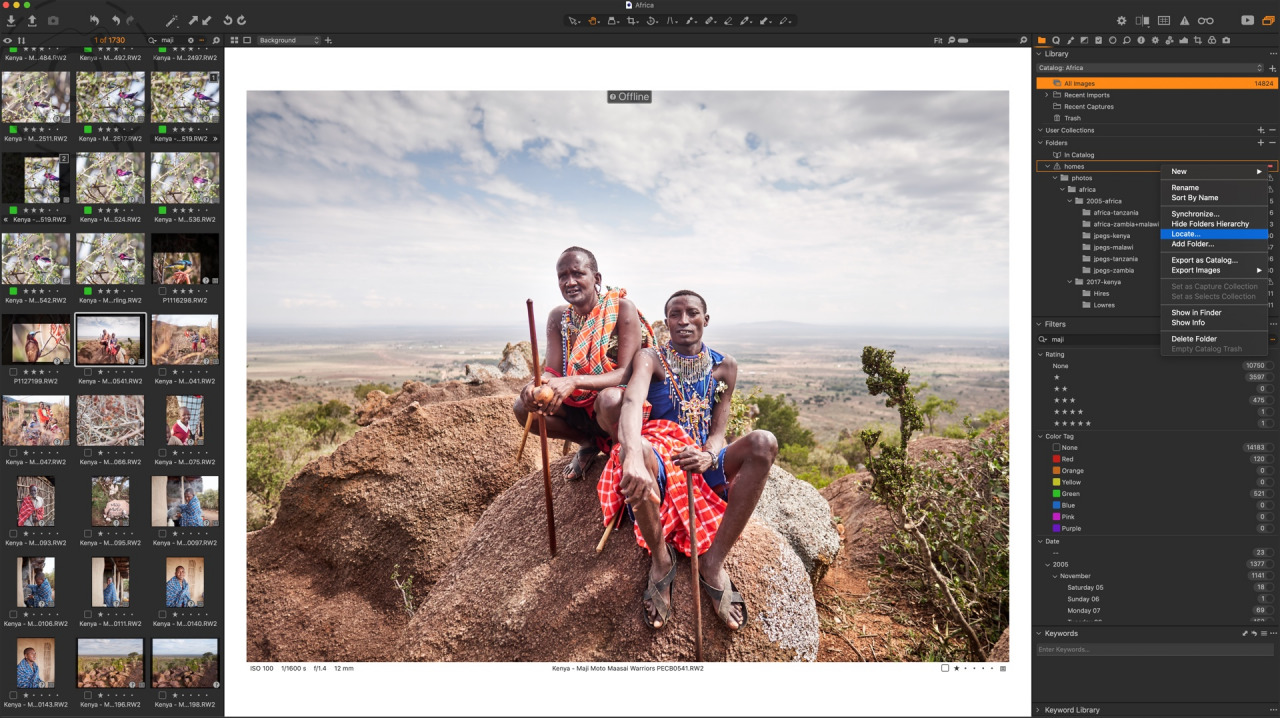
Catalogues stored on RAID work fine once built
Reality in 6K
Earlier I had nice things to say about my $250 OCW adaptor that brought 10GbE speeds to my iMac. It was great, until it died and I had to revert back to the inbuilt gigabit port. I was already running over SMB protocols instead of iSCSI or NFS, for the sake of reliability, so in fact I wasn’t getting the full benefits of 10GbE anyway. I did notice hitting choke points a little more often, especially with Capture One in session mode, where it sanity checks and indexes a folder the first time your session opens it. Heavy use of the heal+clone tool also caused me frustration. I’d have to start a new healing layer for heavy files because the delay in writing the updates to network were killing my productivity and mental health.
I had enjoyed many months of genuinely fast ethernet, both for stills photography and video. We were doing a large project where each day I was generating about 20gb worth of RAW photos, and as much as 100gb worth of video. Even over gigabit instead of 10GbE, I could still edit 6K 10-bit video across the gigabit link with zero drama. More than workable. My modest little iMac will hit the wall on Fusion FX and other enhancements waaaay before the speed of the network ever becomes a serious issue.
For most things gigabit ethernet is fine. It’s easy easy easy to get setup to use it, lots of hardware supports it and you won’t have any drama with power-sucking electricals. Gigabit is good and anyone can play. And who knows, maybe one day WiFi-6 will actually deliver something to match a copper wire. You can run gigabit from desktop to NAS right now, and it will work well for most workflows including 6K 10-bit video.
The hard part will be setting up new catalogues. I really wish Capture One would look at tying in with NAS manufacturers and building apps that run ON THE NAS to setup catalogues for Capture One to connect with. Stop moving terabytes of data from RAID to desktop, just leave it all internal to the NAS and pull across the previews as needed. That would make life better, and might help get around the scaling issues that plague both Lightroom and Capture One catalogues. In the meantime, I move the catalogues from NAS to SSD when I need to build or travel.
I may not be living the dream, but I do at least have 48TB of double redundant storage and eventually I’ll order a new 10GbE adaptor. Perhaps next winter as the weather gets cold again.

Keep Reading
Join Ewen's newsletter for monthly updates on new photography articles and tour offers...Subscribe Here

