


Funny how little things on a camera can get you excited. Like the moment I first realised the GH6 has four custom dial settings instead of just three. Even better, C4 on the dial can be quickly modified to any of ten pre-saved custom settings. The best part is you can rename each of those settings to something more meaningful than just C4-4 for example.

Years ago I posted an article here in my custom settings for the LUMIX G9, and let people download those settings to give them a head start with shooting wildlife and birds. That’s still one of the most popular pages on my website. Here I’m doing the same thing, but for the GH6 and with an emphasis on the variety of codecs and frame rates you may want to capture video with.
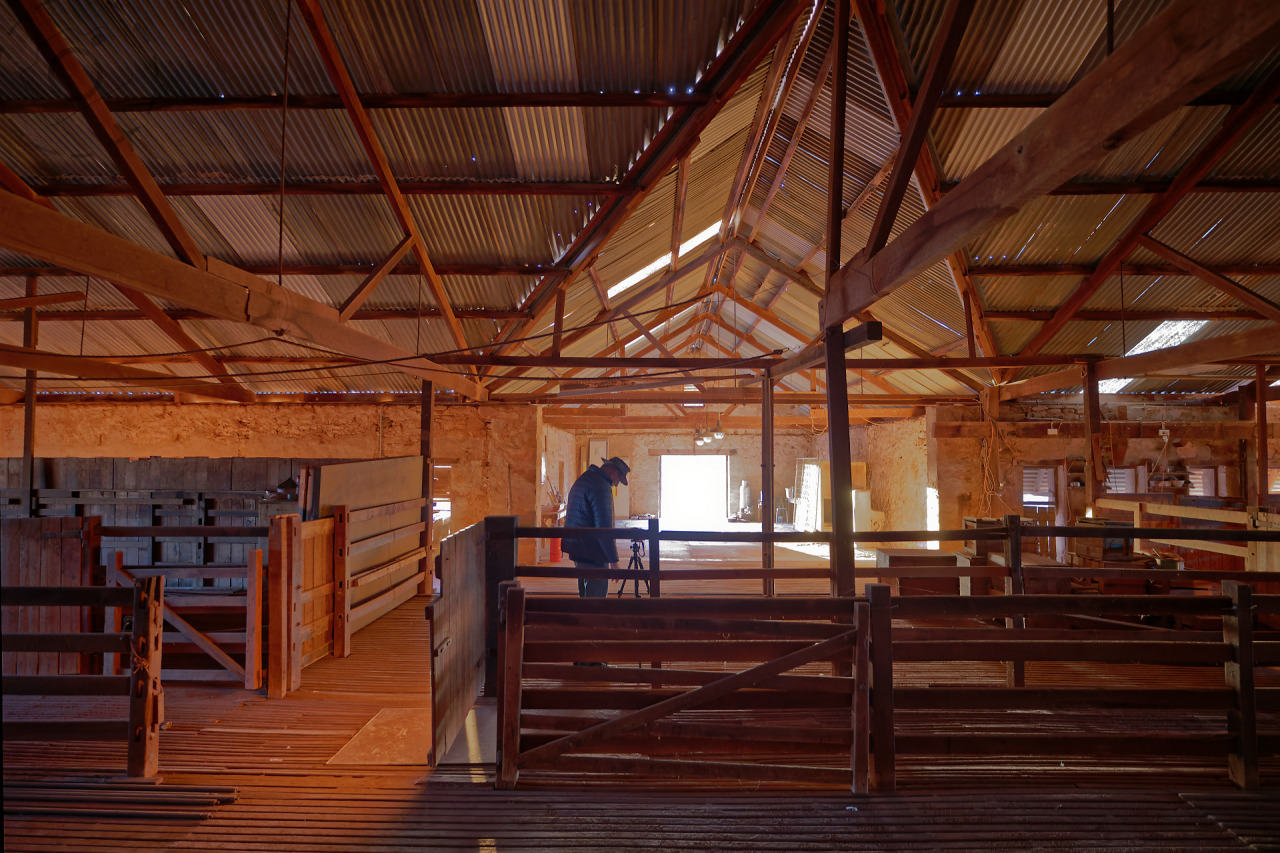
I’ve just got back from two weeks travelling in the Australian Outback, and rigorously trying to push the limits of the GH6. I learned a lot about the camera on this trip, and made a lot of mistakes. For example, when shooting star tails for two hours you have to make sure the inbuilt stablisation is turned off. I made this mistake twice, once with each of the camera bodies I was travelling with! I've learned from my mistakes though, and stored that wisdom into my custom settings.
Most of my settings reflect my personal preferences. I hope you’ll be able to quickly apply them to your GH6 and then modify them over time to suit your needs. I love the application of custom dials on the LUMIX cameras, in part because it’s so quick and easy to tweak your setup and simply overwrite your existing settings with the new one.
If you just want to jump to the download for these settings, slide on down to the bottom of the page. These are the custom settings I'm sharing here today:
C1 / Stills
C2 / 5.7K
C3 / 120fps
C4-1 / ProRes 5.7K 422
C4-2 / ProRes HQ
C4-3 / Star Trails
C4-4 / Landscapes
C4-5 / Birds In Flight
C4-6 / Night 4K
C4-7 / Live Stream
C4-8 / Milky Way
C4-9 / Aurora
C4-10 / Interview
C1 / Stills
On every camera I own the C1 setting is reserved for shooting stills with lots of shallow-focus, using Auto ISO and a minimum shutter speed of 1/200th of a second. I can grab any camera in the house and know that C1 is something familiar and useful. I love this setup for portraits, for still life and even some landscape moments where shallow depth of field can be employed as a tool for composition.
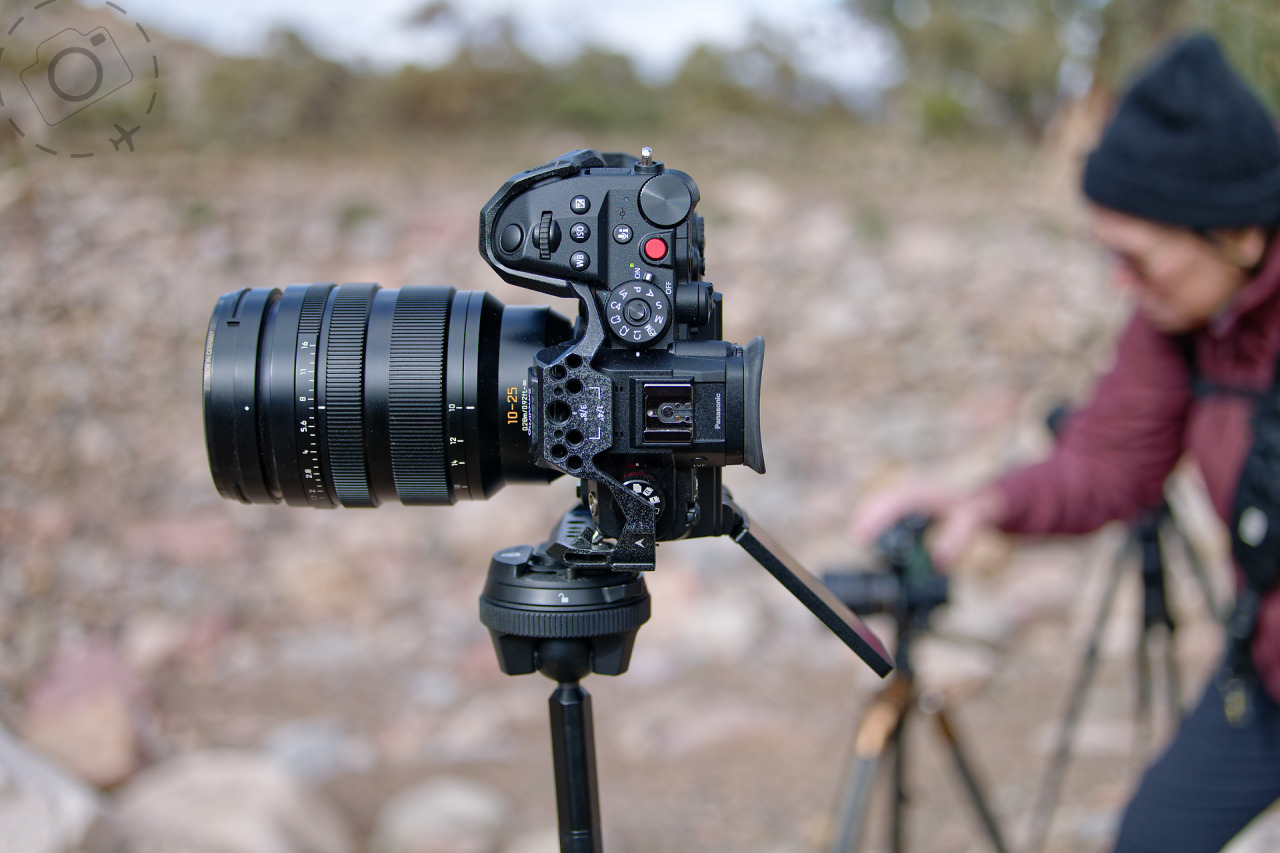
On the full frame LUMIX cameras I use f/2 for shallow depth of field, but on the GH6 or G9 I use f/1.7. Mostly I shoot with the 10-25mm f/1.7, so that’s wide open for me anyway. This trip I also carried the 25-50mm f/1.7, which is very similar but turns out gets very close to macro range in addition to the gorgeous bokeh. Panasonic are making some sensational lenses for the MFT format, and neither of these two beasts have an equal in the world of full-frame systems.
C2 / 5.7K
This is my everyday shooting video dial. VLOG is my home base for all video, and my C2 setup captures 5.7k at 10-bit with 420 chroma. I shoot with a "system frequency" of 24.00hz (see explanation further down in the article) so my C2 is recording at 24fps. If you use the PAL frequency then you'll capture at 25fps, and the NTSC version of my C2 is using 29.97fps. Capturing at 5.7K gives me that little bit of extra detail that allows me to throw some dynamic zoom into the edit without losing 4K quality. Dynamic zoom in post is way simpler than trying to create smooth motion with camera movement, and a lot more flexible.
I’m using H.265 instead of ProRes because I like the smaller footprint of H.265 and so does my NAS box. Most of what I shoot are landscape or still life, so I don’t have tracking or face detection turned on by default. It’s quick and easy to pop those into the mix though, and when in C2 I have the front lower-button primed to call up the face-detection if desired, or just hit the centre of the focus switch to select tracking features.
The other setting I experimented with before settling on my preferred C2 was shooting footage in Aperture Priority instead of Shutter Priority. I love shallow depth of field and it’s very much my happy place when I’m composing for video. Shooting at f/1.7 for example gives me soft layers and a bunch of bokeh to work with. My usual rig is filming outdoors without filters, so I know this results in much higher shutter speeds and the possibility of staccato changing the vibe of my footage. That’s only a problem when filming things moving quickly, so for most of my travel content I’m going for slow and smooth anyway.
One final note, which applies to any footage captured in V-Log on the GH6. Log gamma works best when you avoid pushing the shadows, and grab a little extra in the highlights. On the S1H we mostly shoot +2 stops over when capturing in V-Log, but I’ve dialled that back a little bit on the GH6 to just +1.3 stops. It reflects the fundamental difference between the S1H and it’s richer dynamic range, and the excellent but smaller sensor of the GH6. Any of the settings here that use V-Log I have also set +1.3 stops of exposure compensation, plus turned on the VLOG lut for the in camera monitor (EVF or rear display).
C3 / 120fps
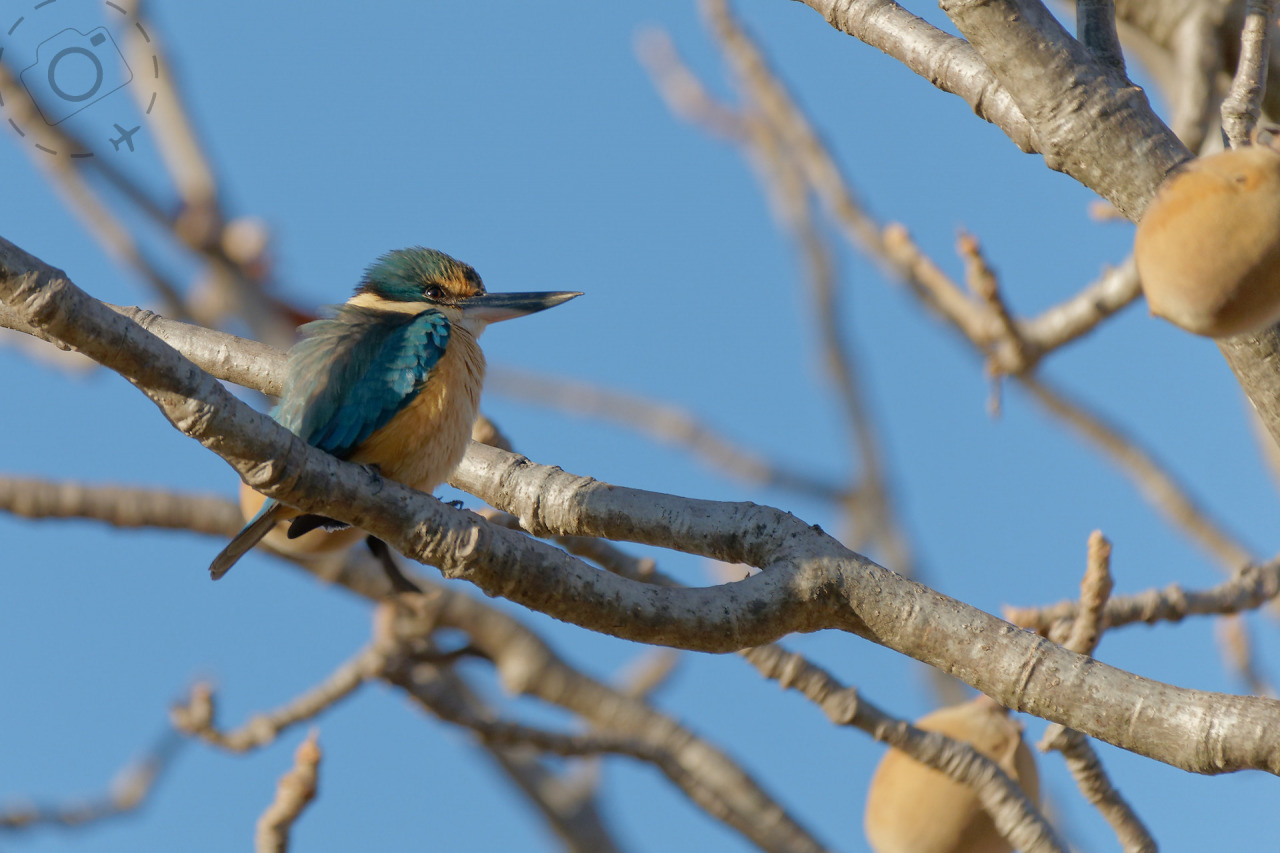
Instead of 5.7K 24fps my C3 is capturing 120fps at 4K. I love this capability and used it a tonne in The Outback. It makes scenes buttery smooth and that H.265 codec keeps the file size manageable. Used for wildlife and birds this setting was dynamite, giving the audience a detailed look in rich 4K but still letting the slow-motion step forward. Was great for heli-shoots as well, with that little bit faster shutter speed.
One important difference in this setup is moving to Shutter Priority instead of Aperture, and setting that to 180°. I’m shooting 120fps in order to slow down things moving fast, and if you don’t reign in the shutter angle you will get obvious staccato in the footage. Early on during this trip I had some gorgeous honeyeaters going crazy at a watering hole, but with the shutter speed too fast; Everything is very crisp but lacking the velvet smoothness that I desired. Holding the shutter at 180° and allowing the f-stop to climb higher than usual when the light is sufficiently bright, is the lesser of two evils.
If you're working in the PAL system frequency this custom setting is using the Variable Frame Rate (VFR) feature to achieve 120fps. This captures 120fps but writes to file as 25fps, so it's automatically in slow motion when you pull the clips through in your NLE. The downside is that Auto Focus is not enabled while working with VFR. Alternately you could replace this setting with the 4K/420/100fps recording mode and that will give you back full Auto Focus again. The NTSC and Cinema system frequencies both offer 120fps instead of 100fps at the highest 4K recording mode.
C4
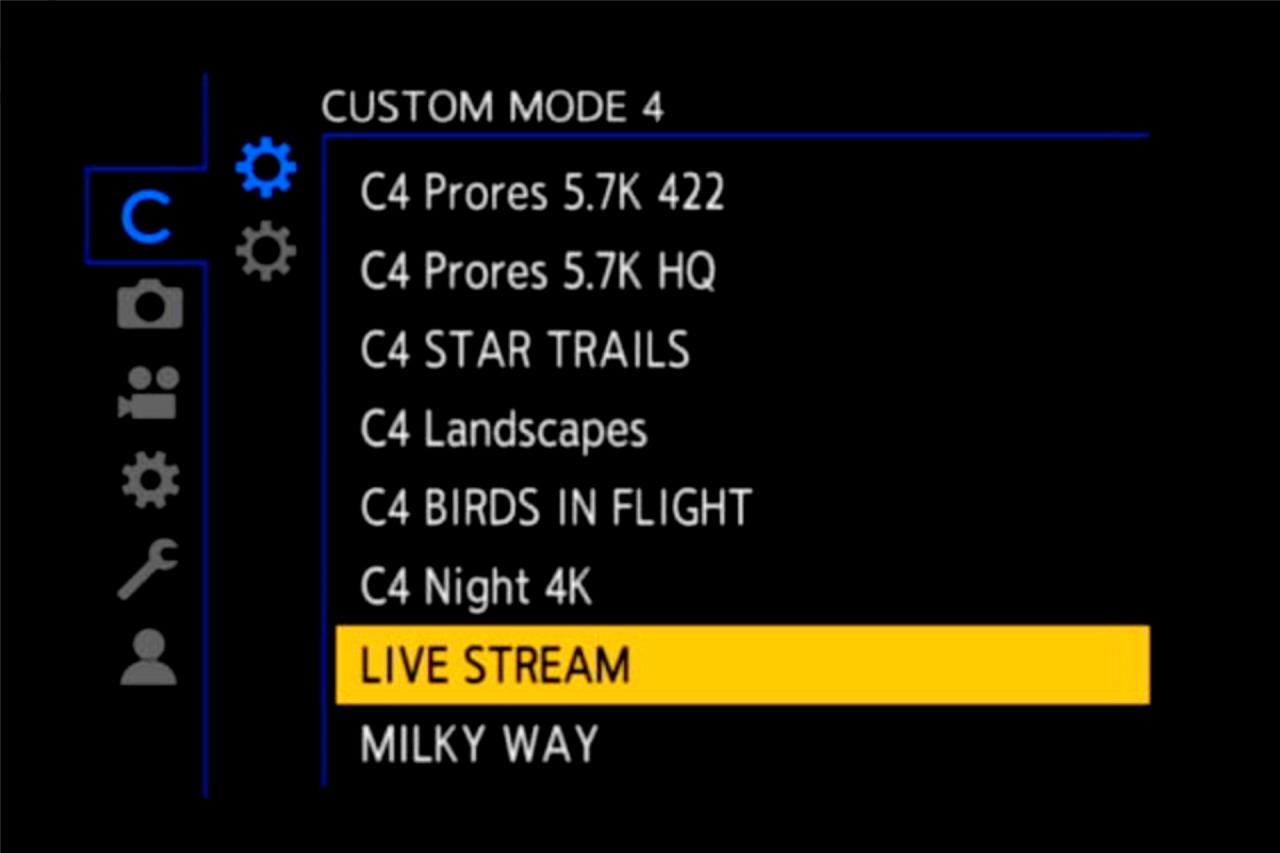
I’ve loaded in a full collection of 10 pre-saved custom settings ready to slot into the C4 dial. The expansion settings on the LUMIX cameras is a marvellous feature once you get your head around it. When you select C4 on the dial it drops into the most recently selected of the expansion settings, and when you hit the menu button it goes straight to the full list so you can quickly re-assign C4 to whichever of your pre-saved settings you need.
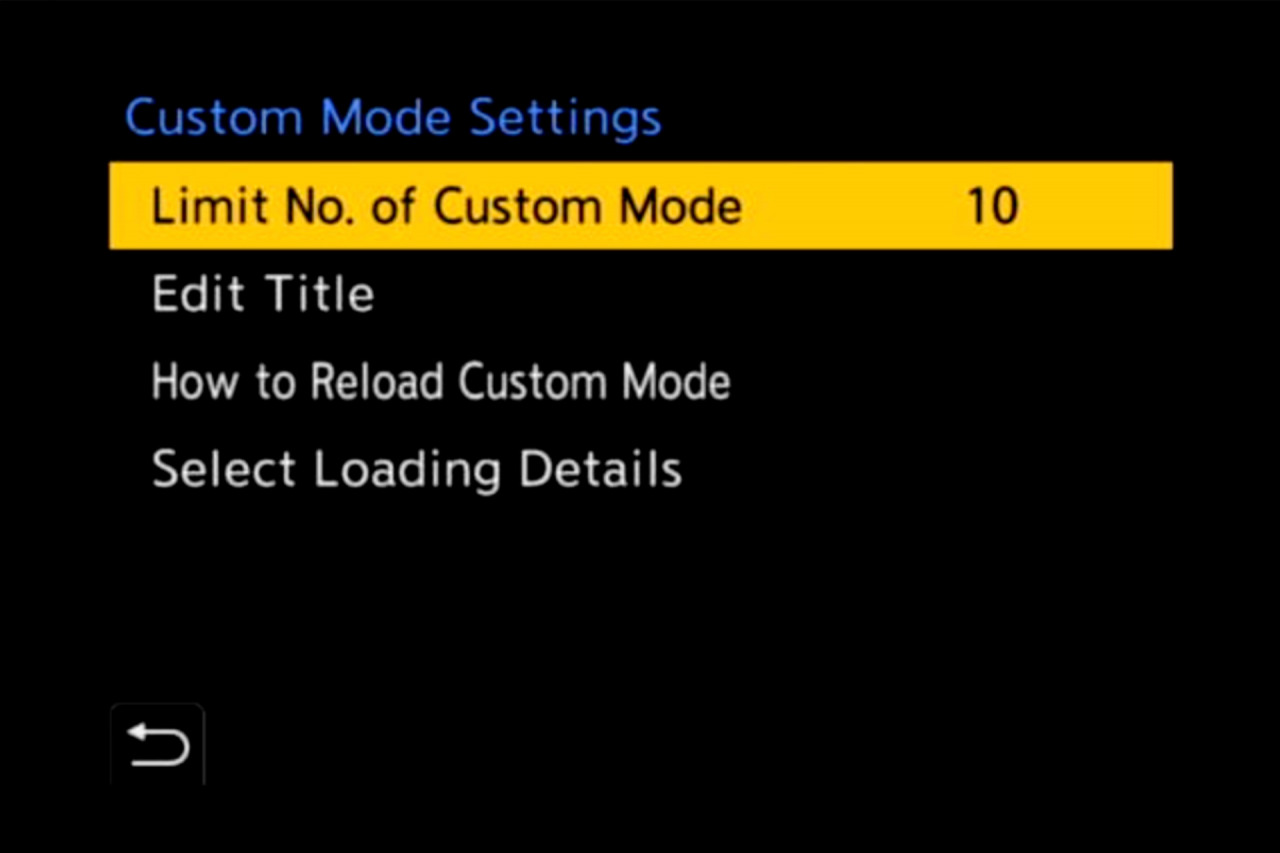
You can save up to 10 custom settings into the expansion list, and you can give each of them a custom title or name to make it easy to find what you’re looking for later! It’s a marvellous implementation. There’s an added benefit if you’re working on a tripod or using the remote app – you can switch between the custom modes in the menu without having to rock the dial itself. Moving from C4-1 to C4-4, for example, can be done with an app on your phone. This is ideal if you’ve got the camera hoisted on a studio crane, or if you’re shooting a star trail series and don’t want to risk nudging the tripod setup.
C4-1 / ProRes 5.7K 422
The GH6 is really an amazing bit of kit and with the addition of the CFExpress slot it’s now packing internal ProRes recording at a range of compression settings. Capturing at 5.7K is a dream on the edit desk, because you have room for dynamic zoom in post-production. There’s also the added benefit of 422 chroma sub-sampling if you’re planning on pushing the colour grading later. For my work I’m leaning into the natural tones of a scene anyway, so that’s not a deal breaker for me.
This custom setting is tuned with 24fps for cinema (or 25fps for PAL, or 29.97fps for NTSC) and the rear display is cleaned up of all but the most essential information to avoid distraction. I tested this mode for a heli-shoot during the trip, figuring that some gorgeous tidal flats around Wyndham might be worthy of the additional quality shooting ProRes 10-bit 422 at 5.7K. After a 30min flight I had filled about 300GB on my CFexpress. You have been warned.
C4-2 / ProRes HQ
This setting was identical to C4-1, except the ProRes setting was bumped up to the highest data rate of 1.6gbps. Inside the GH6 I had an AngleBird AV Pro CFExpress SE 512GB Type B card. Just rolls off the tongue don’t it? These cards guarantee sustained writing speeds in excess of 800MB/s, which in data rate nomenclature gives you 6.4gbps or higher. This is four times the requirements of ProRes HQ at 5.7K 10-bit 422, delivered on a card that costs less than AUD $300. Superb value.
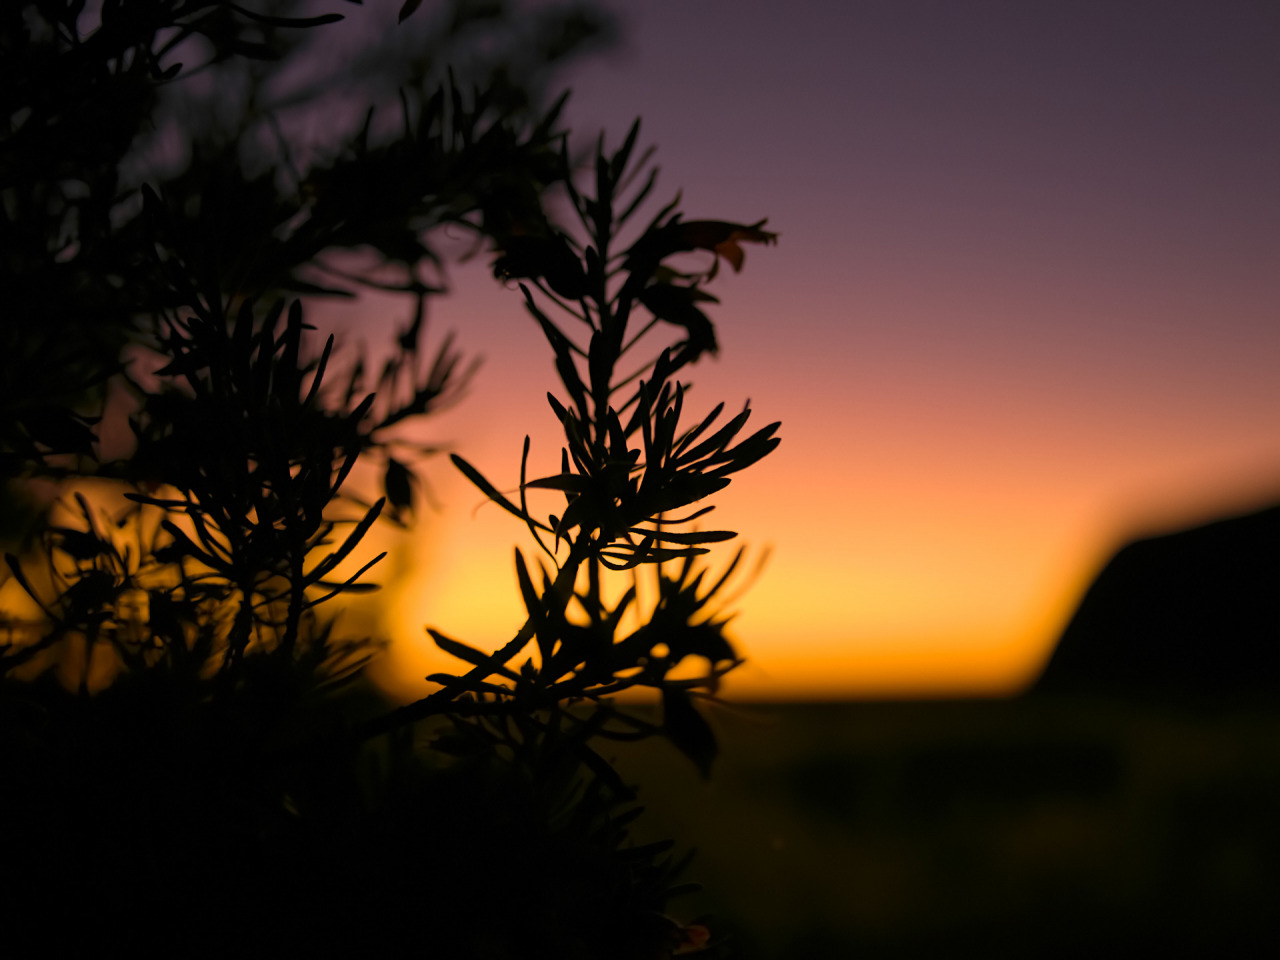
C4-3 / Star Trails
Hiding away a preset for this kind of esoteric purpose is absolutely what I love about the custom dial expansion menu. When shooting Star Trails with my “Bright frame to the West” technique I like to capture a post-sunset glow of my subject in silhouette, then wait for the stars to come out before capturing a minimal number of stars moving across the sky for a couple of hours. The camera and tripod must not be moved between these two setups, or else the overlay won’t stack properly.
I’ve got this setting tuned for shooting stills with Manual exposure with a 30” shot at f/5.6 and ISO 800. I also punch in my time-lapse settings to keep rolling for 1000 frames or so, and very very very importantly I have the IBIS (in built image stabilisation) deactivated entirely to avoid that from messing up my trails. I made this mistake twice on the most recent Outback trip; one of the perils of travelling with a brand new camera you’re still trying to setup for your own work. The other thing that has to be deactivated is the Long Exposure Noise Reduction, so I’ve set that in the custom settings too.
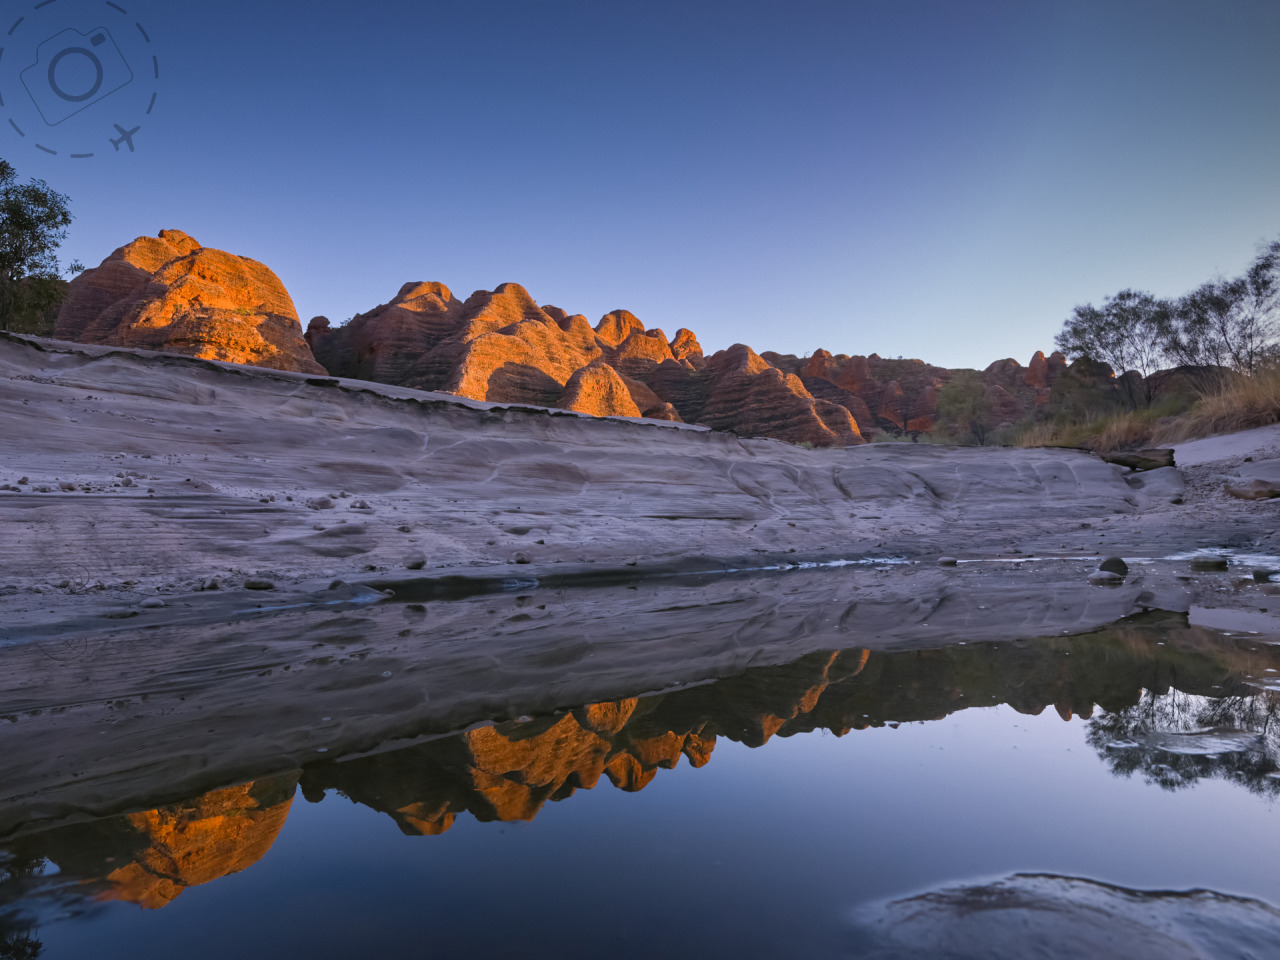
C4-4 / Landscapes
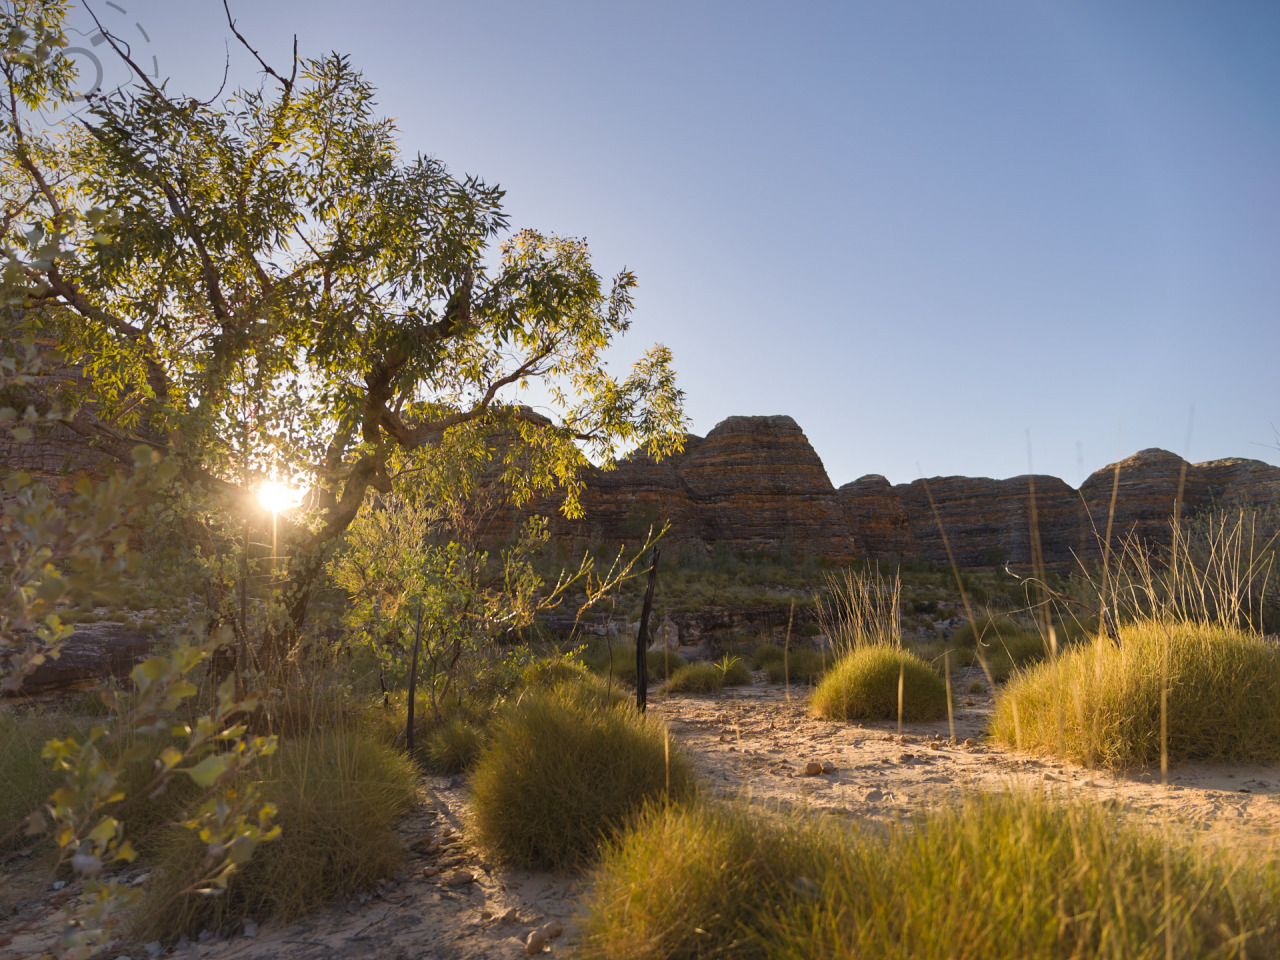
There are times when I put my camera onto a tripod and compose some stills with great care and maybe even pull out a filter or two. Not often, but it happens. This setting is going to useful when I’m running a tour in Arctic Norway and want to capture the waves rolling in with pin sharp foreground. ISO is locked at 100 and the aperture dialled to f/7.1. You get a tonne of depth of field in the MFT sensors and especially when shooting with an ultra-wide lens. The downside to the smaller cameras is that you start seeing diffraction a little earlier than on full-frame lenses.
Because the GH6 gives you access to the multi-shot / pixel-shift / hires mode on the drive dial, you cannot preload the 100MP feature into the custom settings. If you’re coming from the G9 or S5 you will need to remember that the 100MP option is already hiding in plain sight, you don’t have to dig around looking for it in the menu.
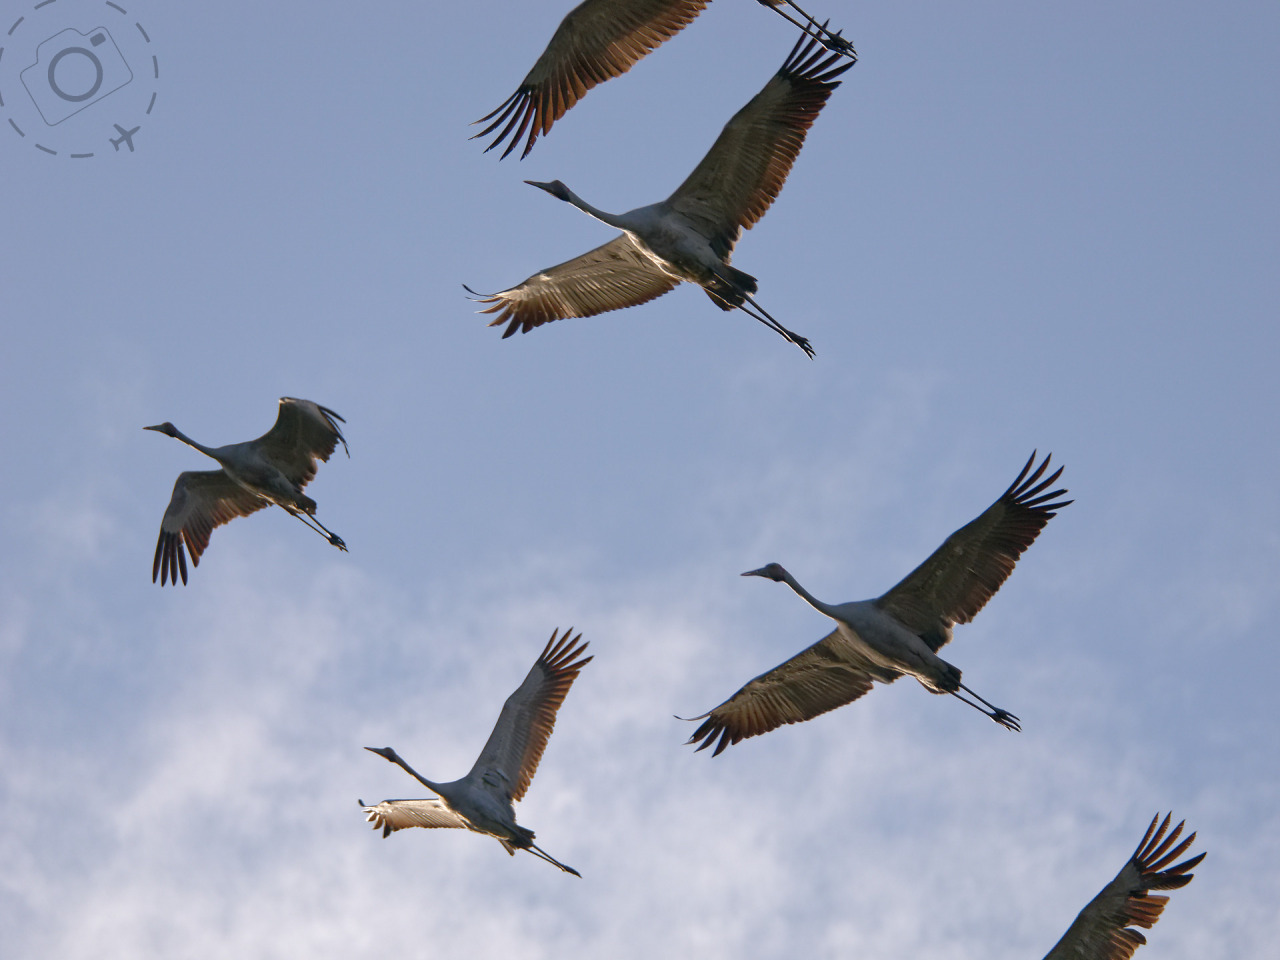
C4-5 / Birds In Flight
My standard mode for capturing stills of birds is C1. When I put the 100-400mm lens onto a GH6 with C1, the aperture bumps up to the widest the lens can deliver (f/6.3 at full telephoto extension), and the combination of IBIS and ISO does all the heavy lifting. Most of my shots at 1/200th of a second are sharp. Birds in flight are a totally different challenge however!
The typical scene would be brolga taking off above a billabong at dawn. The sky is bright and the birds are either backlit or well-lit. Either way, what you don’t want is your AF set to a tiny little area. You need it expanded very large so you have a fighting chance to land the bird inside the AF area. 400mm on a GH6 is the equivalent of 800mm on a full-frame camera. That’s a very narrow field of view to line up a brolga, let alone line up a tiny AF zone inside the viewfinder.
Go big, and go fast. I set the minimum shutter speed to 1/2000th of a second instead of 1/200th. I also configure the continuous burst speeds so that Continuous One uses high-speed mechanical shutter (around 8fps), and Continuous Two uses the electronic shutter to grab 20fps. I change my mode dial to shoot my mood for speed. These represent a significantly more aggressive use of the continuous burst features compared to my usual C1 settings, keeping in mind that the GH6 will give you 75fps of RAW captures if you want it.
C4-6 / Night 4K
We're getting into the more random configurations now. A few times in my travels I wanted to see capture some video in dreadful light, and have the camera tuned to eek out a result. This settings only pushes to 4K instead of my preferred 5.7K, but allows me to shoot 422 chroma subsampling which ensures I have maximum flexibility when grading the footage. I’m still using V-log gamma because the style of night shooting I want is for very dark shadows and most importantly to avoid blowing out my highlights. I know most people would avoid V-Log for their night scenes but you can tweak that if you prefer.
C4-7 / Live Stream
This is my preset for when I have to run an online workshop over Zoom for two hours, but only started setting up my desk 5 minutes before the event starts. It’s one of the rare times I have the camera set to video but don’t use V-Log. I tune up the picture settings to give me a nice look with soft contrast and good roll-off in the highlights, set the aperture wide open to f/1.7 and let the AF do the rest. I have the face detection activated and the AF is always on even if we’re not recording. This way I’m always in focus as I shift about at the desk. I can also plug in the USB power cable to the GH6 and keep the unit rolling for hours without having to rely on battery power and without the camera going into sleep mode.
Auto ISO is engaged so that I get a decent exposure regardless of streaming day or night, and the HDMI output is a clean feed, so the live steam is unencumbered with the camera info. I can either run the LUMIX webcam software to give my Macbook a live stream over the USB port, or use a capture card to grab the HDMI output. Either way gives great results.
C4-8 / Milky Way
This is one of those settings I get to play with only a few times a year. When travelling in The Outback I often get a chance to capture the night sky above a campfire, or perhaps run a time-lapse of the Milky Way moving above our heads. It’s a wonderful thing to capture. My 10-25mm f/1.7 is a great lens for this because you can set the manual focus very precisely, although my diminutive 7.5mm f/2 Laowa lens is also a good choice and just that little bit wider still.
This setting is essentially trying to get a detailed capture in 10 seconds or less. After that the motion of the stars can degrade the sharpness of your focus. It’s high ISO but generally keeping the aperture around f/2.8 so there’s a modicum of accuracy in the focus. Long Exposure Noise Reduction and IBIS are both turned off for this setting, just in case you decide you want to capture a time lapse instead of a single shot.
C4-9 / Aurora
The Milky Way setting can also be used as a starting point for Northern Lights, at least with a zero moon. A bright aurora events will not only test if you brought a wide enough ultra-wide, but also easily over expose with my C4 Milky Way. For that reason, 5 seconds at ISO 1600 and f/2.8 is my baseline for Auroras. As they get brighter we often need to drop the exposure down to 2 seconds. Alternatively, if you want to turn the ocean silky with reflections then a 30 second exposure at a lower ISO may be desirable. Auroras offer a lot of room for creativity.
Once again, the Long Exposure Noise Reduction and IBIS features are both turned off for this setting, just in case you decide you want to capture a time lapse instead of a single shot.
C4-10 / Interview
We’re back to the land of V-Log again, this time with a special setup that I use in the studio with an emphasis on manual tweaks instead of using Auto Focus or Auto ISO. In most interview settings the AF is turned off because you’re in a controlled scene. Video has been set to record with manual exposure because in the studio we have very consistent lighting and we don’t need the Auto ISO to adjust anything for us. I’ve also pushed the sound monitor onto the rear screen as a reminder that you need to check audio your levels before recording.
The baseline settings are ISO 250, f/17 and 180° shutter angle. We’re also capturing “Open Gate” with this mode, in case we need a little extra scene for editing an IG reel instead of conventional 16:9 landscape. On the GH6 you can select OpenGate(4:3) by looking for “ANAMOR” in the recording quality settings. All the GH6 anamorphic modes are captured with the full 4:3 sensor. If you're not using an anamorphic lens, you simply end up with a 5.8K 10-bit image at 420 chroma, and plenty of room to trim to fit later. This custom setting can record trouble free onto a V60 rated SD card, which is nice for very long formats where you may want to capture several hours in a single session. My 256GB V60 SD from AngelBird was good for almost 3 hours non-stop.
The other configuration worth paying attention to is your audio settings. For interviews the audio is way more critical than the video, and the GH6 dips the hat by offering some excellent features dedicated to audio. Dialling down the internal gain of the built-in pre-amp, for example, allows you to send a strong signal from your microphone with minimal noise floor inside the GH6. You can also tune down the recording levels even further with a dB adjustment setting. If you’re already doing one of these tweaks, then you likely don’t need the other. I found the GH6 played nicely with my Rode Go microphone using the lowest gain on the Rode plus the lowest internal gain in the GH6. That all bodes well for a clean recording that polishes up nicely in post-processing.
System Frequency
There is one little detail we have to cover before downloading and applying my custom settings, and that's the System Frequency set on your GH6. If you only capture stills, then this setting won't be a big drama. But if you only capture stills then you probably didn't buy a GH6 anyway right!
System Frequency is about frame rates, and frame rates is the first thing you need to choose before you start filming a project. For most of my projects I work with a 24fps timeline, which allows me to fold in 48fps when I need something a little sharper. I can still capture 120fps and slow that down in my editor, so I have a few options aside from just 24fps. My choice to capture at 24fps is a personal one, there is no "right" frame rate.
Because I'm editing on a 24fps timeline, I set my GH6 to a system frequency of 24.00Hz. Once set, all the frame rate options I see in the menu will be based on that System Frequency.
When you apply my custom settings the System Frequency is included in those settings. If your camera is using 50.00Hz (PAL) or 59.94Hz (NTSC) and you apply my custom settings file for Cinema, it will switch the camera to 24.00Hz (Cinema) first. If you change the System Frequency after applying the custom settings, then the recording quality settings will get dumped because the frequencies no longer match.
For this reason I have provided a modified copy of my custom settings file configured for anyone using NTSC instead of the Cinema System Frequency. It's very similar to what I describe below, just tweaked to ensure compatibility with NTSC and using 29.97fps instead of 24fps.
Download My Custom Settings
Click below to download my settings for Cinema (24.00Hz) or NTSC (59.94Hz) or PAL (25.00Hz):
https://ewenbell.com/uploads/GH6/GH6EWEN.DAT
https://ewenbell.com/uploads/GH6/GH6NTSC.DAT
https://ewenbell.com/uploads/GH6/GH6PAL.DAT
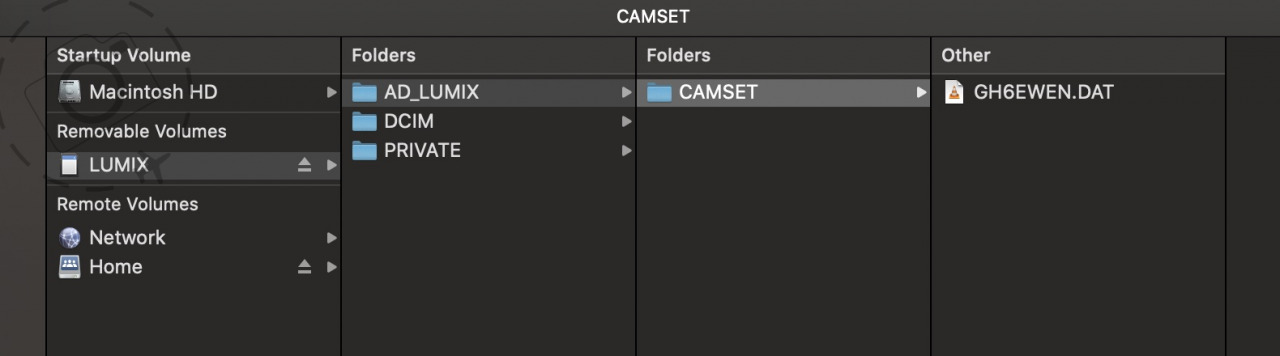
Once downloaded they have to be placed onto an SD or CFExpress card to be applied in camera. Any camera settings DAT files have to be inside a folder called CAMSET, which is inside a top-level folder on the card called AD_LUMIX. See image above for clarification of the folder structure. If you create a backup copy of your camera settings in advance, this folder will already exist on the card.
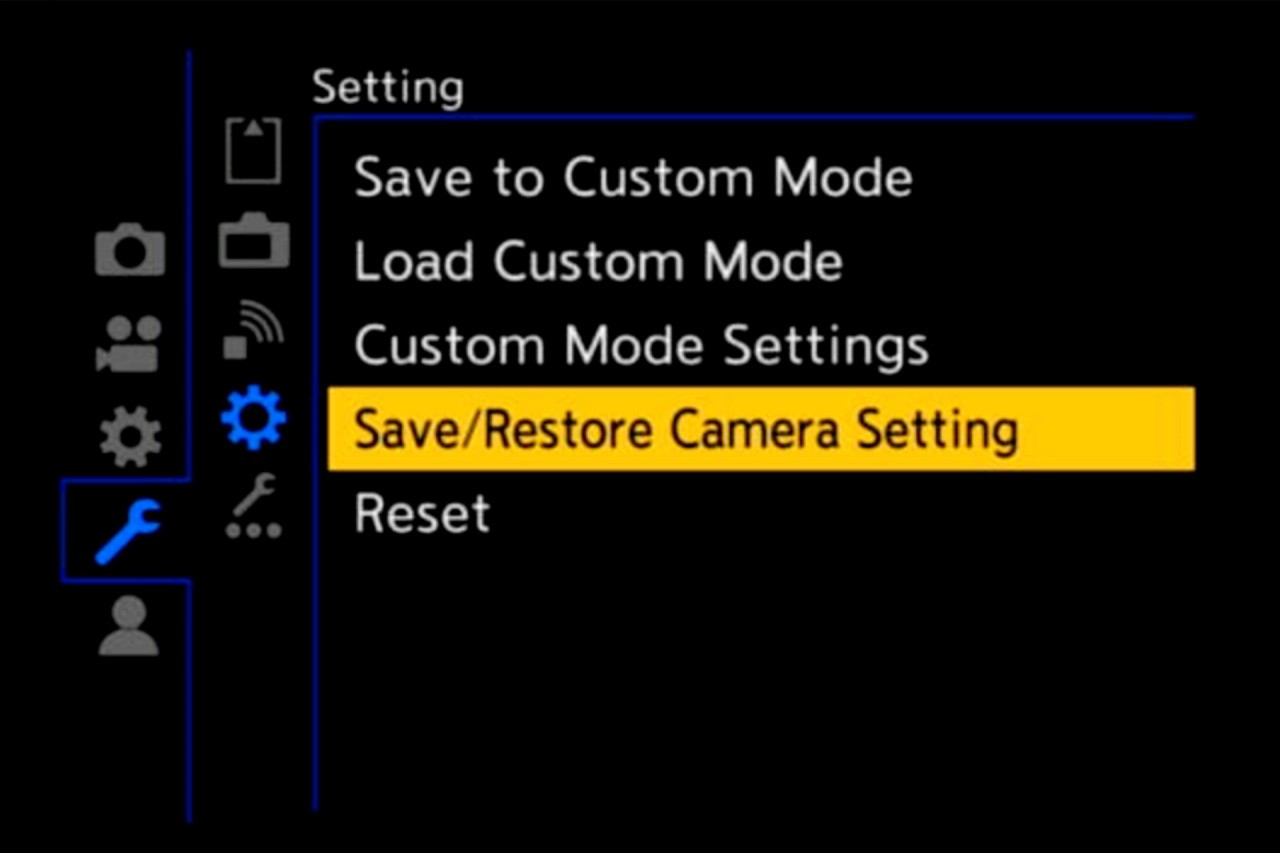
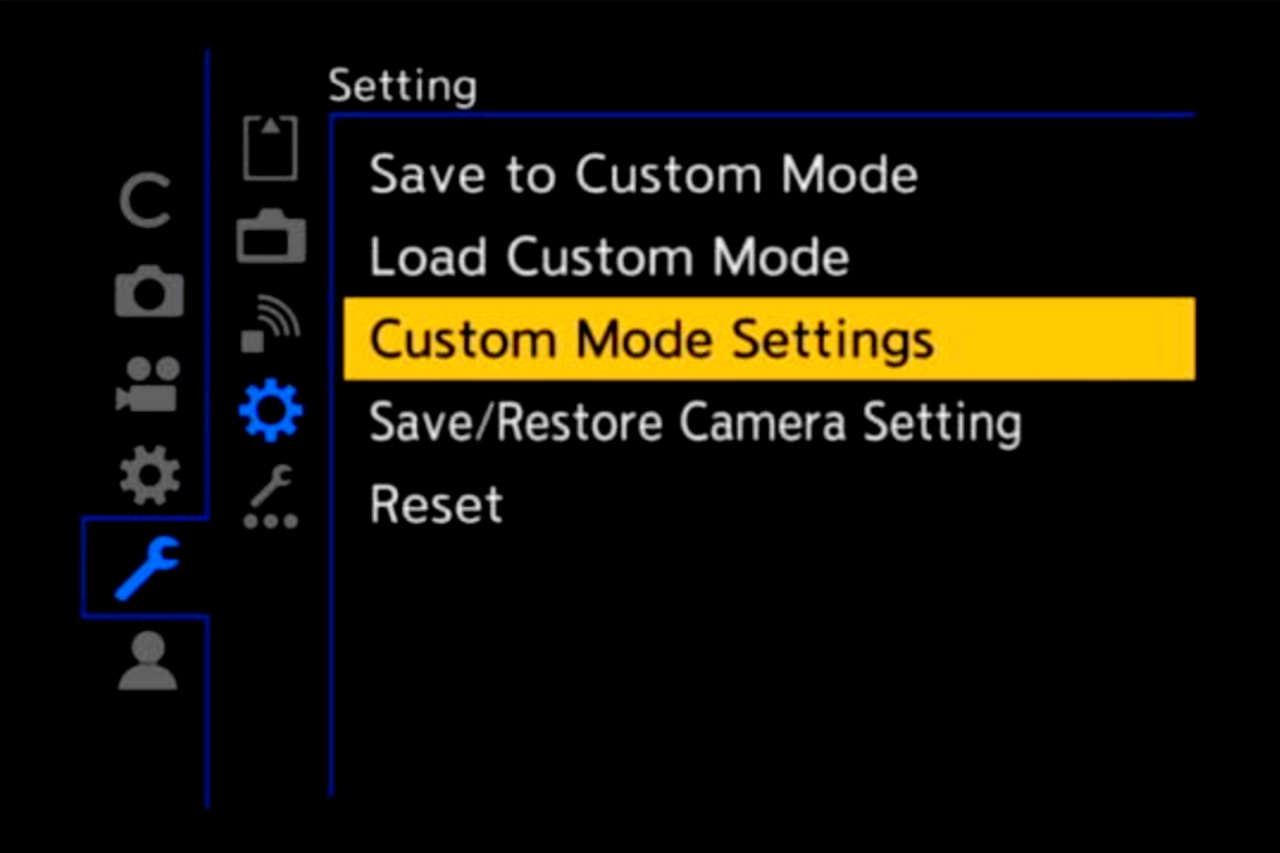
Place the card into your GH6 and go into the menu. Navigate to the Tools section (the big blue spanner), then the Settings (the cog), and then “Save/Restore Camera Settings”. Select “Load”, and locate the file “GH6EWEN.DAT” on your card. And that's it!
Once applied my list of C1/C2/C3/C4 settings will all be loaded in and ready to use. Please note, any setting you previously had in the custom dial or other modes will also updated by my defaults in the DAT file.
If you're unsure about wiping out your entire camera setup with a file some stranger on the internet gave you, I suggest to save a copy of your existing setup before proceeding :)

DIY Custom Settings
For a basic primer on HOW and WHY to set your own custom settings on LUMIX cameras, I recommend you start with this article below:
https://ewenbell.com/blog/Make_The_Custom_Dial_Work_For_You

LUMIX Firmware Updates
Looking for where to download and how to install firmware updates for your LUMIX S or G series cameras? Put your geek hat on and head over to this website:
https://av.jpn.support.panasonic.com/support/global/cs/dsc/download/index4.html
GH6 In Action
All the footage in the edit below was captured on the new LUMIX GH6. It was my first time using this camera and what a joy it was to capture 4K at 120fps. The birds were especially joyous to watch back in slow-motion and stunning clarity. The footage was shot in Vlog with a range of recording modes. After two weeks with the GH6 by my side I feel I'm ready to get the most out of this rig in future :)
Keep Reading
Join Ewen's newsletter for monthly updates on new photography articles and tour offers...Subscribe Here