Spinning Stars


Photographic Field Guides


The Photography Blog

Practical Philosophies
Careers and Ideas
Good Gear
Inspiring Journeys


33


Every year Ewen runs a handful of unique and marvellous tours and workshops. Find out more about what tours are coming up and how to book.

Photo Tours with Ewen


Spinning Stars
An update to last year's feature on shooting star trails. By combining a "bright frame" with the trail you can achieve a smoother and more pleasing look to your trails.


The Photography Blog


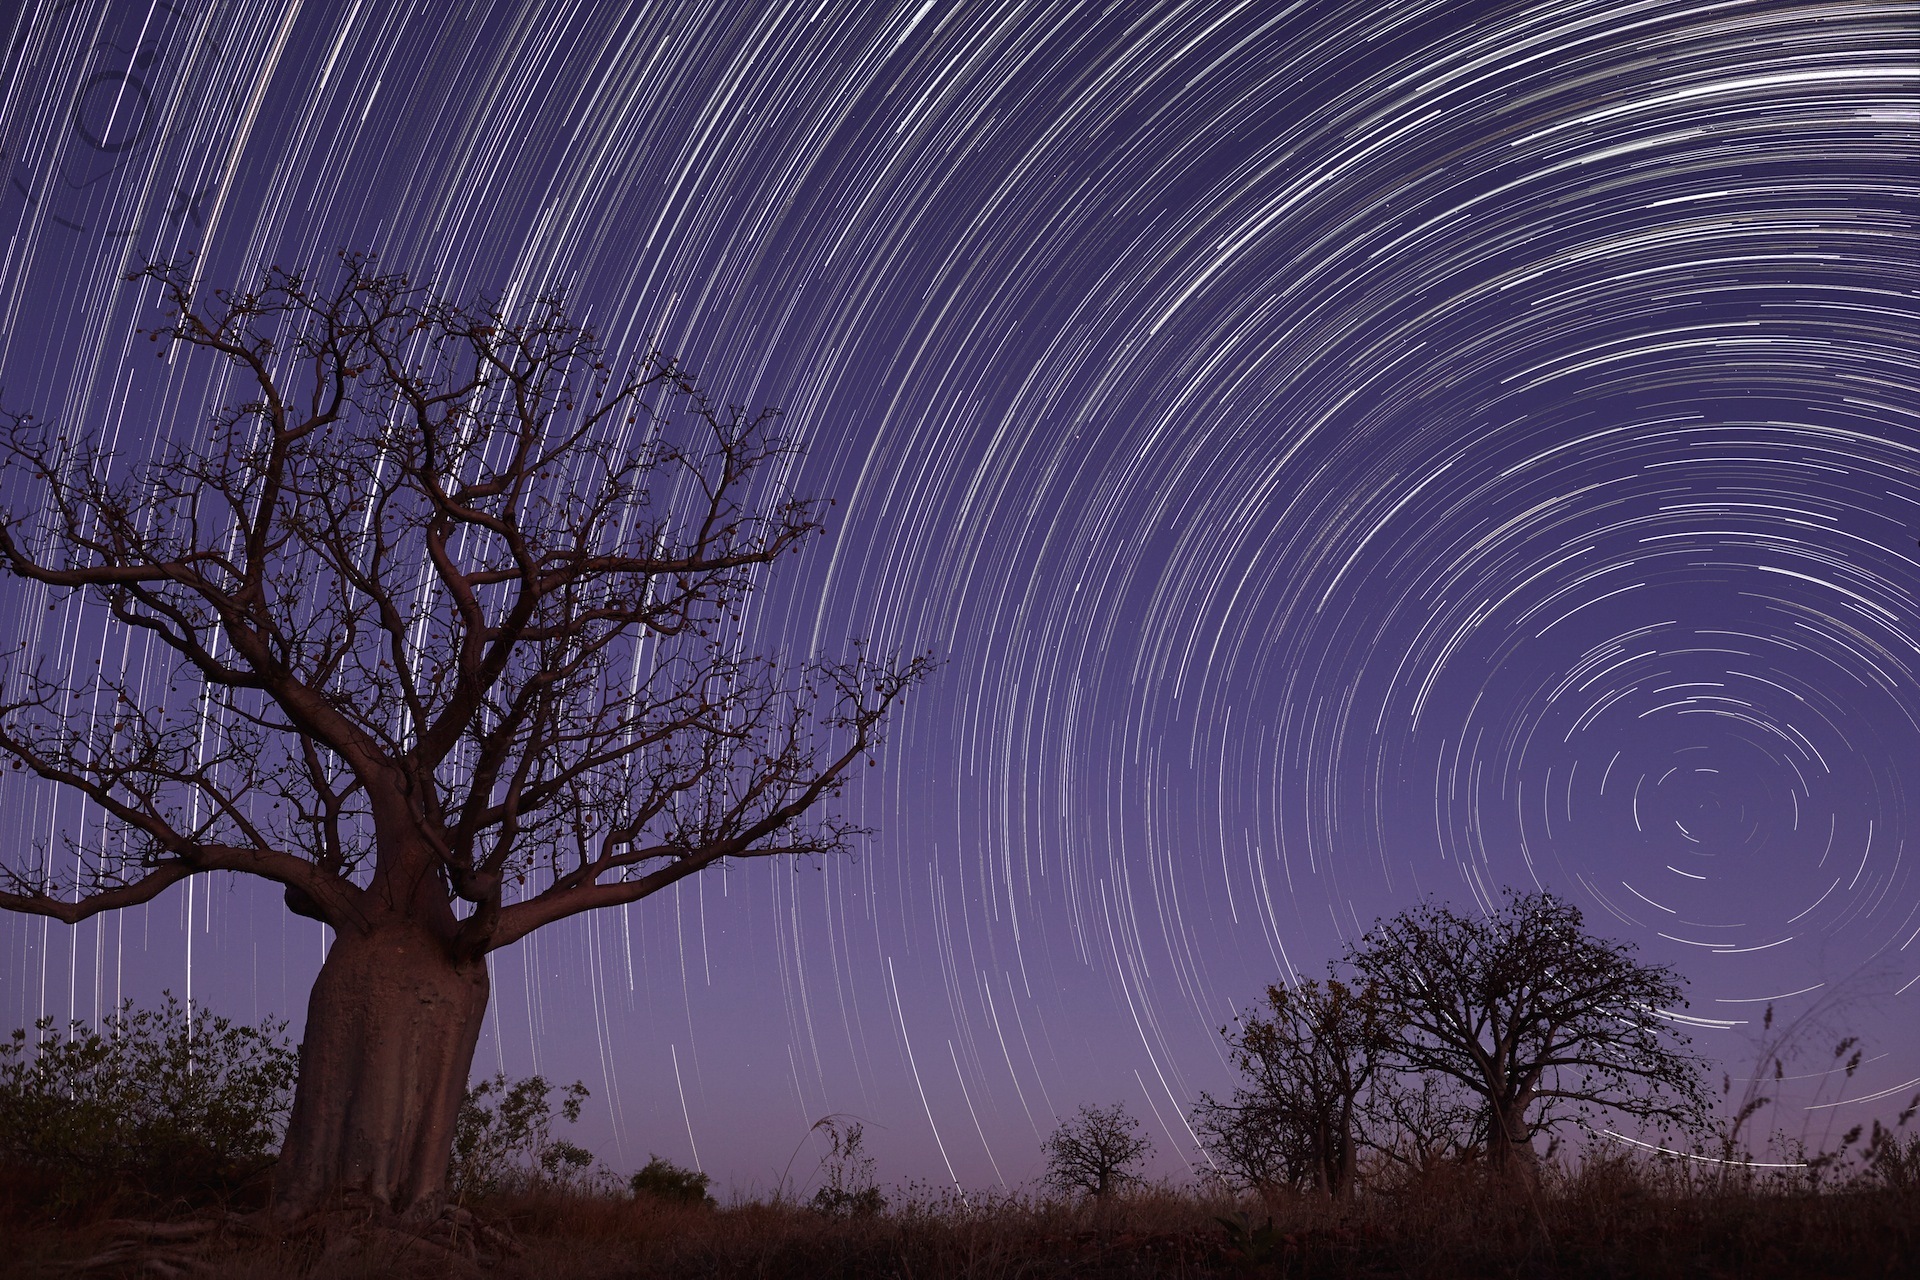
Every year I get a chance to shoot stars in the Kimberley region of Australia, where the skies are clear and the Boab trees provide beautiful silhouettes. Each year I get to rethink and fine tune the process of shooting star trails, and how to process them.

My new favourite method involves shooting two kinds of images and bringing them together for the best effect. The regular series of short and dim frames that I use to compile the actual trail is the first part, but in addition I grab a single "bright frame" that acts as the backdrop to the trail.

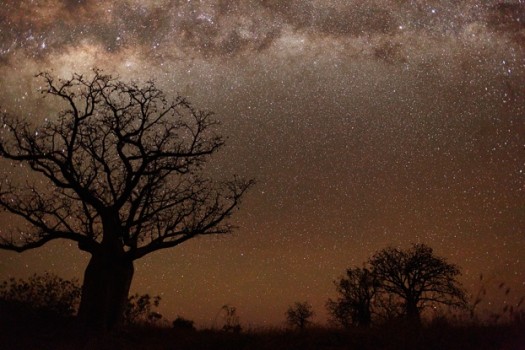
This bright frame is essentially what I usually refer to as a "galaxy map", a high ISO and low f-stop capture that reveals the intensity of the Milky Way. It's pretty easy to silhouette a beautiful Boab with the bright frame, and they're handy for locking down your final composition before rolling the trail frames.

By adding the bright frame to the stacked set of trail captures you get a more subtle background to emphasise the silhouetted subject plus you smooth out the trails as well. By smooth I refer to the jaggy curves or the gaps between frames.

I now also use 30 seconds instead of 3 minutes for each trail frame, and drop the ISO a little in accordance with the minimal number of stars I want in my final compound image.

Working with 30 second trail frames instead of the 3 minute version makes for demanding work at the other end when you have to process the images and stack them. It's certainly easier to build a 2 hour star trail with 40 times 3 minute frames than 240 times 30 second frames. You just need a little more patience and the rewards are a very smooth image.

Also worth noting is the requirement to remove all sharpening when processing from RAW to JPG. This only adds to the harshness of the curves and the trails simply look better when they are softer.

For my new technique the essence comes down to "less is more" and that includes the trails themselves. Instead of filling the frame with intense crowds of stars, and hence illuminating the impression of a silhouette, the trails are a fine and delicate layer that sits above the "Bright Frame". By adjusting your processing of the RAW trail frames, to reduce the exposure if required, you can limit the number of stars that make an appearance and reduce their strength of footprint across the sky.

Soft is good, soft is subtle.

In the middle of a remote location near Home Valley Station we sipped champagne and waited for the sun to fade away. In the daylight we chose our favourite trees and under the star light we released the shutters to capture the night sky.

We worked out where the Southern Cross had risen and had a good idea where the southern celestial pole would appear in our compositions. For two hours we recorded the stars spinning around our heads, returning home with lots of images and a flat battery. The first run through is done at low resolution, a quick test to see if some fine tuning is required before running a the more demanding hires version.

Invariably we find that the trail is too crowded, too bright and too busy. You just cant see it on a single frame, it looks empty and blank. So you run more tests, tweak the treatment to drop out a few more stars and stack them together once more.

Finally the compound image comes together smoothly, convincingly. I shot a few versions of the "Bright Frame" on this occasion, at the end and the beginning of the trail. The Milky Way runs diagonally across the frame in one version, and rests along the top of the frame in another. One more variant was shot early in the evening when only a few stars had popped into view and the foreground is illuminated just enough to give the appearance of a moonlit scene.

All of these are good candidates for combining with the fine tuned trail, combining a bright view of the sky with the spinning stars that dance above.


Click below for the full feature on how to do star trails and galaxy maps, "When the stars come out"...
ewenbell.com/blog/When_The_Stars_Come_Out


  Keep Reading

Join Ewen's newsletter for monthly updates on new photography articles and tour offers...

Thanks, you are now subscribed. Please check your inbox for a welcome email.


Computer says NO.
Please check the email address.


Please Share Your Thoughts


JUST THE FACTS


Settings for Bright Frame
10 Seconds
f/2.8
6400 ISO

Setting for Trail Frames
30 seconds
f/5.6
800 ISO

Use a remote cable release to lock down the shutter and set the camera to Manual mode. Test your lens focus in advance and shoot with auto-focus disabled. If you're not familiar with StarStax then visit the website and let this excellent Freeware application save you the hardship and expense of Photoshop.

Checklist before stepping into the starry night:
- disable long exposure noise reduction
– disable image stabilization in camera and on the lens
- turn off the automatic image preview
- turn off all info on the rear display
- pack a spare battery
- pack a small flashlight
- mount your tripod plate to the camera firmly
- don't buy a cheap tripod: get a solid set of legs and a really sturdy head.
- Shoot RAW for maximum flexibility when editing your final images for stacking

When the stars come out
Click below for my previous feature on how to do star trails and galaxy maps, "When the stars come out"...

ewenbell.com
This feature was last updated on Sunday 16th June 2013
This article was published and written by

Copyright
All images and words on this web site are copyrighted and may not be used without permission.
When requesting permission to republish this article please quote reference #1192.

URL for this Article


Related Links
  Australia  The Kimberley  Photographic Field Guides  Star Trails  Milky Way  Outback

Fabulous field guides for my favourite destinations. Full of rich detail to help you make the most of your photographic opportunity on location.

Why Auroras Look Different on The Camera

What your eyes see and what your camera sees are typically very different when it comes to the Aurora Borealis. Capturing the Northern lights on camera changes our entire perception of this phenomenon, and mostly for the better. Just a word of caution though if you're heading to the Arctic and expect to see those Photoshop colours with the naked eye.


Layers of Colour with ICM

Intentional Camera Movement (ICM) is a doorway to opening your creativity. Here I present a hands on guide to getting started, with an emphasis on using ICM to blend colours and textures.


Panning for Gold in Kathmandu

Panning is a simple way to kill an afternoon and make yourself exhausted. The concept is pretty simple: you use a slow shutter speed like 1/30 of a second to separate a moving object from a chaotic background. Hundreds of your shots will be useless. A rare few will be perfection. Those are the ones you show your friends.


Butterflies in Bhutan

I'm going to miss Bhutan when I head home, but this time for the most tiny of reasons. The butterflies. Having a few days to step into their miniature world of scaly wings and hairy heads has been an absolute joy.


Stars Over Uluru

I've written a few articles on the basics of star trails, but the finer details on making your trails look as lovely as possible are often where photographers struggle the most. This article explores the finer points from my annual visit to Uluru to chase the stars.


See What I See

Introducing my new series of streaming videos you can enjoy at home, and see what I see after taking a walk in the park with camera in hand. See what I see as I walk through the images on my desktop and extract precious moments from the RAW files.


Ewen's Photography Book


"ReIMAGINE" is now available to order online.
It's a very big and very generous book that will help you to reconnect with your creative side.


ReIMAGINE